Sunday, December 15, 2019

One Hour Wargmes Medieval : Changes for Next time


As I was clicking around reading blogs (I check for people posting new stuff several times a day and when that fails, I just start looking at "most popular posts" and following links), I found that  Alex addressed many of  the grey areas in the OHW Medieval rules in a post on his Spear to Strife blog in 2017, followed by a version of the rules featuring his own clarifications integrated into them.

Image from Friday night's battle. I use three colors of dice - green for the first 6 hits, yellow for the second 6 hits, and red for the last 3.

The biggest thing that was bothering me was what constitutes contact for melee purposes. I have been saying any contact at all, even a corner on the flank edge for example, would be enough for the devastating flank bonus. But even as I ruled that was the case, a corner contacting an edge didn't visually look enough like charge into melee and didn't sit right with me.

Having read Alex's posts and thought about it a bit more (and given my use of 4" square bases) I will use contact/overlap-with-half of the edge (he suggest 3" in his version of NT's rules linked above and that's probably better, but I'll start with half, or 2" in my case)  as indicative of melee being reached. Thus, a corner making contact alone would not be enough, nor would contact with the enemy's corner alone.

I can recall clearly instances where this would have slowed the destruction, as units would have had to moved to a better position before they charged into an enemy's flank, or they may even have lost the flank advantage entirely, as the enemy could have gained an opportunity to rotate to meet the threat. Would this have changed the outcome of  either game? I don't know.

His use of just two movement rates will be taken wholesale into my game.

There's a typo in the Kindle edition I have, where  the movement rates for the Medieval rules reflect the unit types of an earlier rule set. So, infantry, skirmishers and warband, and cavalry are given rates rather than men-at-arms, archers, knights, and levies, and you're left to figure out which should get what. I was allowing levies 9" but had no particular justification (remember, the bulk of what I know of the history for this period, comes from Neil Thomas's chapter preceding the rules).

Both of these will eliminate some grey areas that took me out of the game and into the rulebook (which, seems silly given how few pages the rules are).

Saturday, December 14, 2019

One Hour Wargames: Down at the Crossroads (scenario 11)

Following their victory near the border between Eastern and Western Aurora, the Duke of Lux, vassal of Sol, King of Dies, crossed his army into Western Aurora, intent on capturing a major crossroads that would give him access to all of Aurora. He did not expect to encounter any resistance from the Nox forces, as they had been observed moving deeper into Western Aurora back towards their own border.

For his part, the Duke of Tenebris, in service to Luna, Empress of Nox, had left a small holding force East of the crossroads to cover their withdrawal, but he had little reliable information about the movements of the Dies army.


Initially confusion reigned  and some doubt from the Nox holding force about their life choices, and neither side was able to effect much of anything. A lone rider from the holding forced raced Westward to alert the the commander for the Nox rear guard.


Meanwhile, the aggressive commander of the the Dies vanguard charged with his main body of knights and the sounds of a bloody battle rang out through the woods. A third unit of knights, and their men-at-arms, made their way around the Northern woods, intent on outflanking the enemy.


Alerted by the rider, the commander of the Nox rear guard sent two units of knights to join the fray. They arrived in time to intercept the flanking Dies units - but it was still too late, as their own holding force had crumbled.


Then, too, the reinforcements were overwhelmed.


Having driven the enemy from the field, the crossroads belonged to Dies, but a second wave of Nox reinforcements arrived from the Southern road.


Outnumbered and facing two units of well armored men-at-arms,  the odds were not in favor of the new arrivals. Indeed, the Nox archers managed to get off  just a single volley before being charged.


When the dust settled, Dies had uncontested control of the crossroads and access to all parts of Aurora.


Suffering a second defeat, the Duke of Tenebris lead the remnants of the Nox army in a further withdrawal deeper into Western Aurora, and closer to the border with Nox itself. Certainly, his queen would be forgiving of one loss. She would be less so about this one. A third loss would come at a great personal cost.

The Duke of Tenebris entered his tent that night with much on his mind.


*****
This is scenario 11  from Neil Thomas's One Hour Wargames, "Surprise Attack".

Nox was Red, Dies was Blue.Because I use 4" squares and the Blue army arrives via the road on turn 1, I extended one dimension by 6", to fit them all on the table on the first turn. So the table was 36" x 42". I went with the forces I rolled - which was unfortunate for Nox - they really could have used two units of men-at-arms.

Once again the rules used were the medieval rules from that book.

This time the game went all the way to turn 14, although the conclusion was obvious from turn 8 when the Dies army eliminated the last of the Nox units on the table and could leisurely wait for the last two Nox reinforcements to arrive on turn 9. That two of the four remaining Dies units were men-at-arms further cemented the likelihood of their victory (half damage). Even when they lost their last unit of knights, they were in no real danger of losing the battle over all.

I debated including the archers in the initial force on the table - thinking perhaps they could weaken one of the knights in front. That may have been a better option - saving them to mop up was far too optimistic.

I do wonder how much a 4' x 4' table would have changed things : I think the archers would have gotten off two volleys at least.

This time not being able to leave the scrum was less of an issue because there wasn't a single focal point of the game - although I suppose the crossroads could be if the Blue army chooses to completely by-pass the Red units blocking the road. Instead, there was some movement, with the Blue army flanking the woods and the Red army riding to meet them, while a battle raged by the woods.

I used the same solo chance mechanism this time as last. Again I played both sides, and again Nox was my side, so the chance events favored Dies.

Also, because this is a campaign, I gave one unit of the Dies army a 1d3 hit bonus because Dies won last time, and one unit of Nox a 1d3 hit penalty because Nox lost - which units received the adjustments was  randomly determined.

The next scenario is "Static Defense" and so I will play the Nox force as they are the attackers and have more interesting choices. Since we are closer to the border now, Nox they will have one unit with a 1d3 bonus, to represent an influx of troops over said border, but they will again have a unit with a 1d3 penalty (because they lost). The Dies army will have a single unit with a 1d3 bonus.

Wednesday, December 11, 2019

Stuart Asquith's Wargaming World War Two : First Impressions

I recently found and purchased a copy of Stuart Asquith's Wargaming World War Two online. I very much enjoyed his writing in his solo wargaming book and the WWII title was mentioned in several remembrances that I read with his recent passing. For the sum of less than $6 USD shipped it was a no-brainer.

This won't be a detailed review - as I haven't read it in its entirety yet - but perhaps at some point I should write one, as I could find little about the actual contents.


It seems fairly complete with a potted history, details about various armies, the various arms, weapons data, and rules for using it all.

Sample vehicle data.
It's probably not the latest research on the weapons and armies, but how much new has come to light about things that were already 50 years old at the time it was written?

The writing appears to be clear and concise, but friendly.

There are a couple of scenarios, too, so it's a complete package.

Desert scenario map.
I probably won't end up using the rules themselves, but they will serve as inspiration without a doubt. My first glance reaction is that they have a Battle-like approach of explaining rationale, albeit in a condensed manner and I always enjoy that kind of discussion.

Monday, December 9, 2019

One Hour Wargames: War Comes to Tempus

The land of Tempus has long been the stage for the bitter rivalry between two countries, Dies and Nox. Independent buffer states - Aurora, Mane, Vesperum, and Nocte, - sprang up in the distant past and have variously served to cool or exacerbate the tempers of the dominant pair. Presently, it is a time of the latter, and the uneasy truce in their war over control of the continent has come to an end yet again. This time, it is hapless Aurora that is caught in the middle.

The Duke of Lux, vassal of Sol( the King of Dies, also known The Sun King (not that one)), having raised an army at his king's behest, advanced this force into Aurora under diplomatic pretense. However, such is the nature of courtiers and intrigues that Luna, Empress of Nox, Queen of the Night (not that one), quickly learned of the deceit. In turn, she commanded the Duke of Tenebris to raise a force and prepare to meet the threat.

With a preternaturally prescient understanding of the situation, Lux ordered an advance guard to race to, and take control of, a strategic hill overlooking the main road between Eastern and Western Aurora. The remainder of the holding force would follow.


The Nox army under Tenebris moved eastward into Aurora, where, it comes as no surprise, the leading elements of the force collided with Lux's avant garde.

And so it was that the inevitable new war began.


The Nox knights were ordered to dislodge Lux's units from the hill as quickly as possible in hopes of controlling it before the remainder of the Dies force arrived.


A maelstrom of clashing steel, men, and horses swirled about the hill.


The new arrivals for Dies charged into the fray, with a unit of knights held back and ordered to run down the Nox archers - who, it may be said, had quite literally become a thorn in their side.
.


Flaunting a previously captured banner of Nox, the knight's charged. They would pay dearly for their indiscretion.

Men fell and fled on both sides, but the scale of victory tilted heavily towards Dies.


The last of  the remaining Nox units fought fiercely, but in the end, they were outfought by the Dies men serving under Lux.


But, to be sure, the war had only just begun.


*****

This is scenario four, "Taking the High Ground" from Neil Thomas's One Hour Wargames, The rules used are the medieval rules from the same book.

As I have noted before, I know little to nothing of the period, so I find these rule adequate (with OHW I think the more invested in a period you are, the less satisfying the rules will be, without making at least some adjustments for your pet aspects of the period) - they do tend to lead to a scrum, since units can't leave melee once engaged and forces will have at least 4 melee units. However, a large scrum of warriors is what Hollywood tells me is period correct, and I assume at least some of the writers have done the research, so it works for me. Heaven help me if I read an Osprey on period tactics though.

The main thing I have to remember with OHW is to not think I have the rules internalized - it's too easy to forget a modifier when you're a little rusty (+2 for shooting with archers for example). The other is that that men-at-arms on a hill are really hard to beat (they take 1/4 damage).

Of the other rules I have, I am most intrigued by Charlie Wessencraft's medieval rules in Practical Wargaming but that would require re-basing (as these are just Blu-Tacked to coasters it's not that big of a deal but never the less). Morschauser's shock rules could work if I used single figure "trays" and used say, 4-6 trays per unit, as the melee rules are truly brutal there.

Other areas of note:

The game officially ended on turn 10 but I could have called it on turn 7 or so, when the Nox force only had two units left. This is typical of OHW - games in my experience rarely last until 15 turns. Total time for setup and tear down was about an hour.

I played both sides and used the same solo mechanism I used for the Morschauser game the other day, because I was rooting for Nox. It clearly worked well in that "my" side lost.

The next scenario will be number scenario 11, "Surprise Attack".

Friday, December 6, 2019

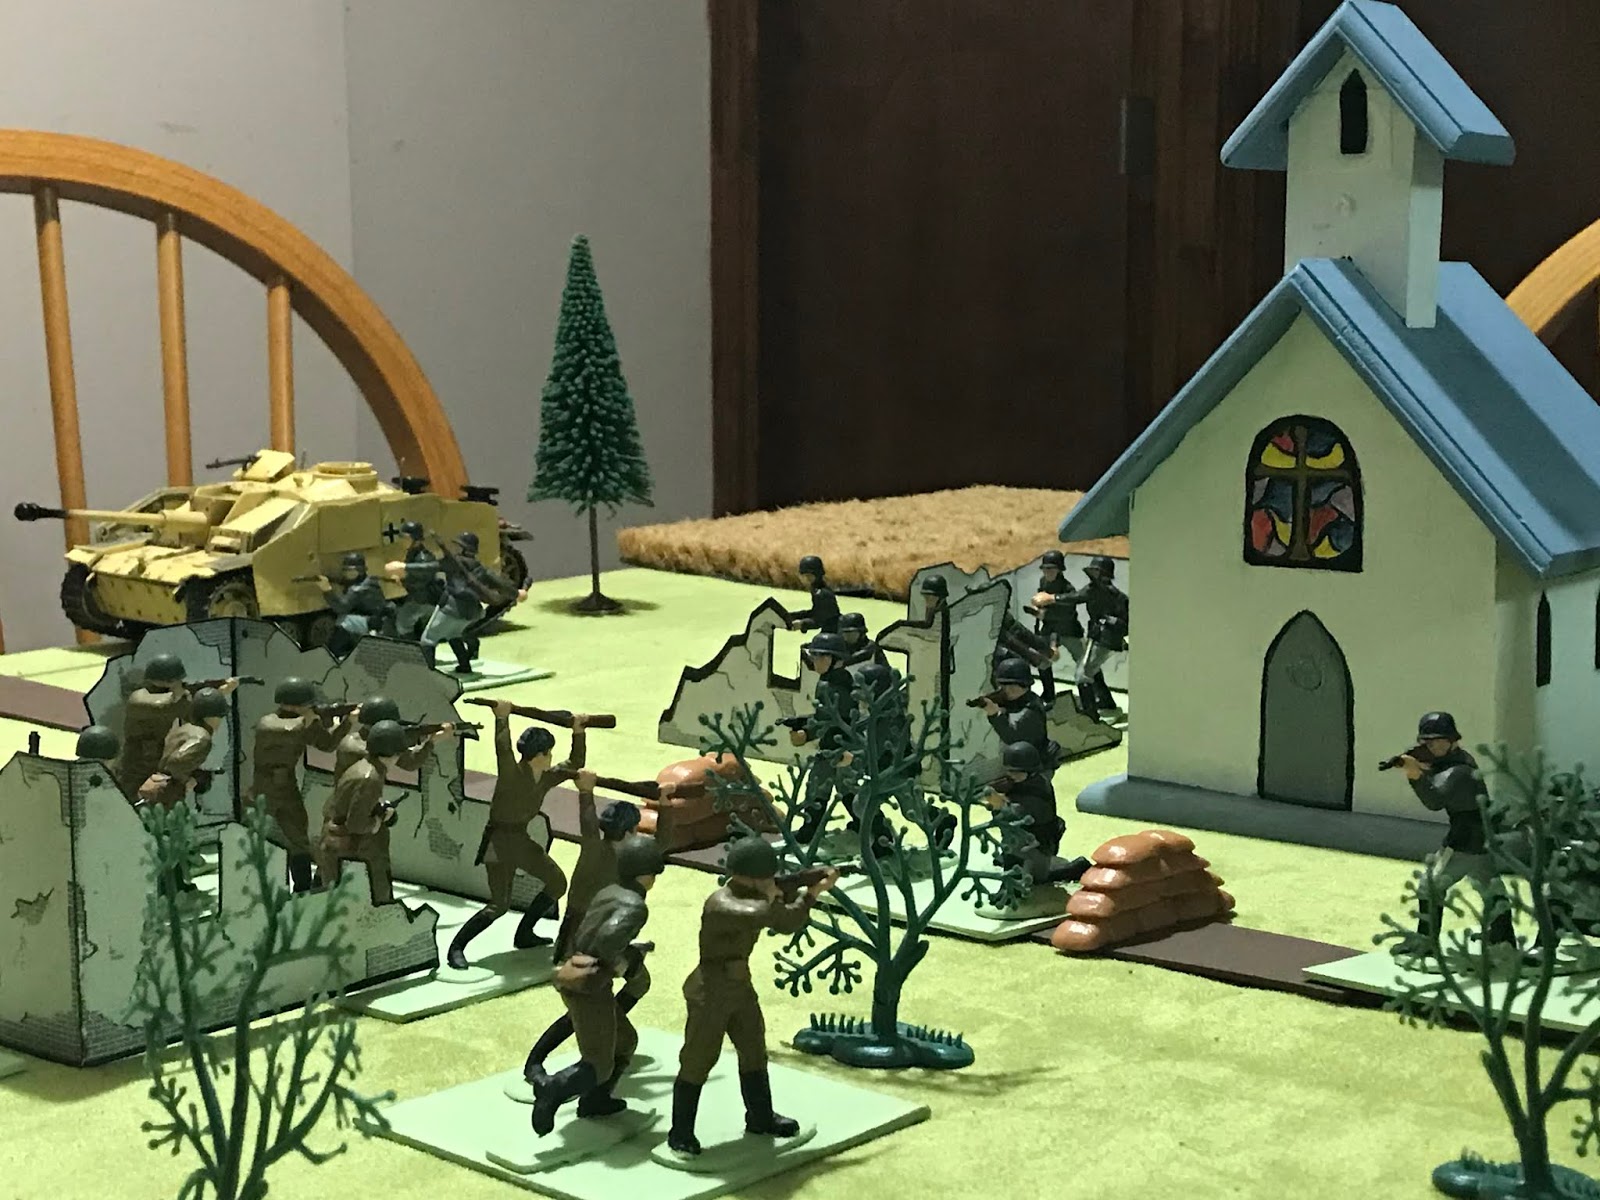
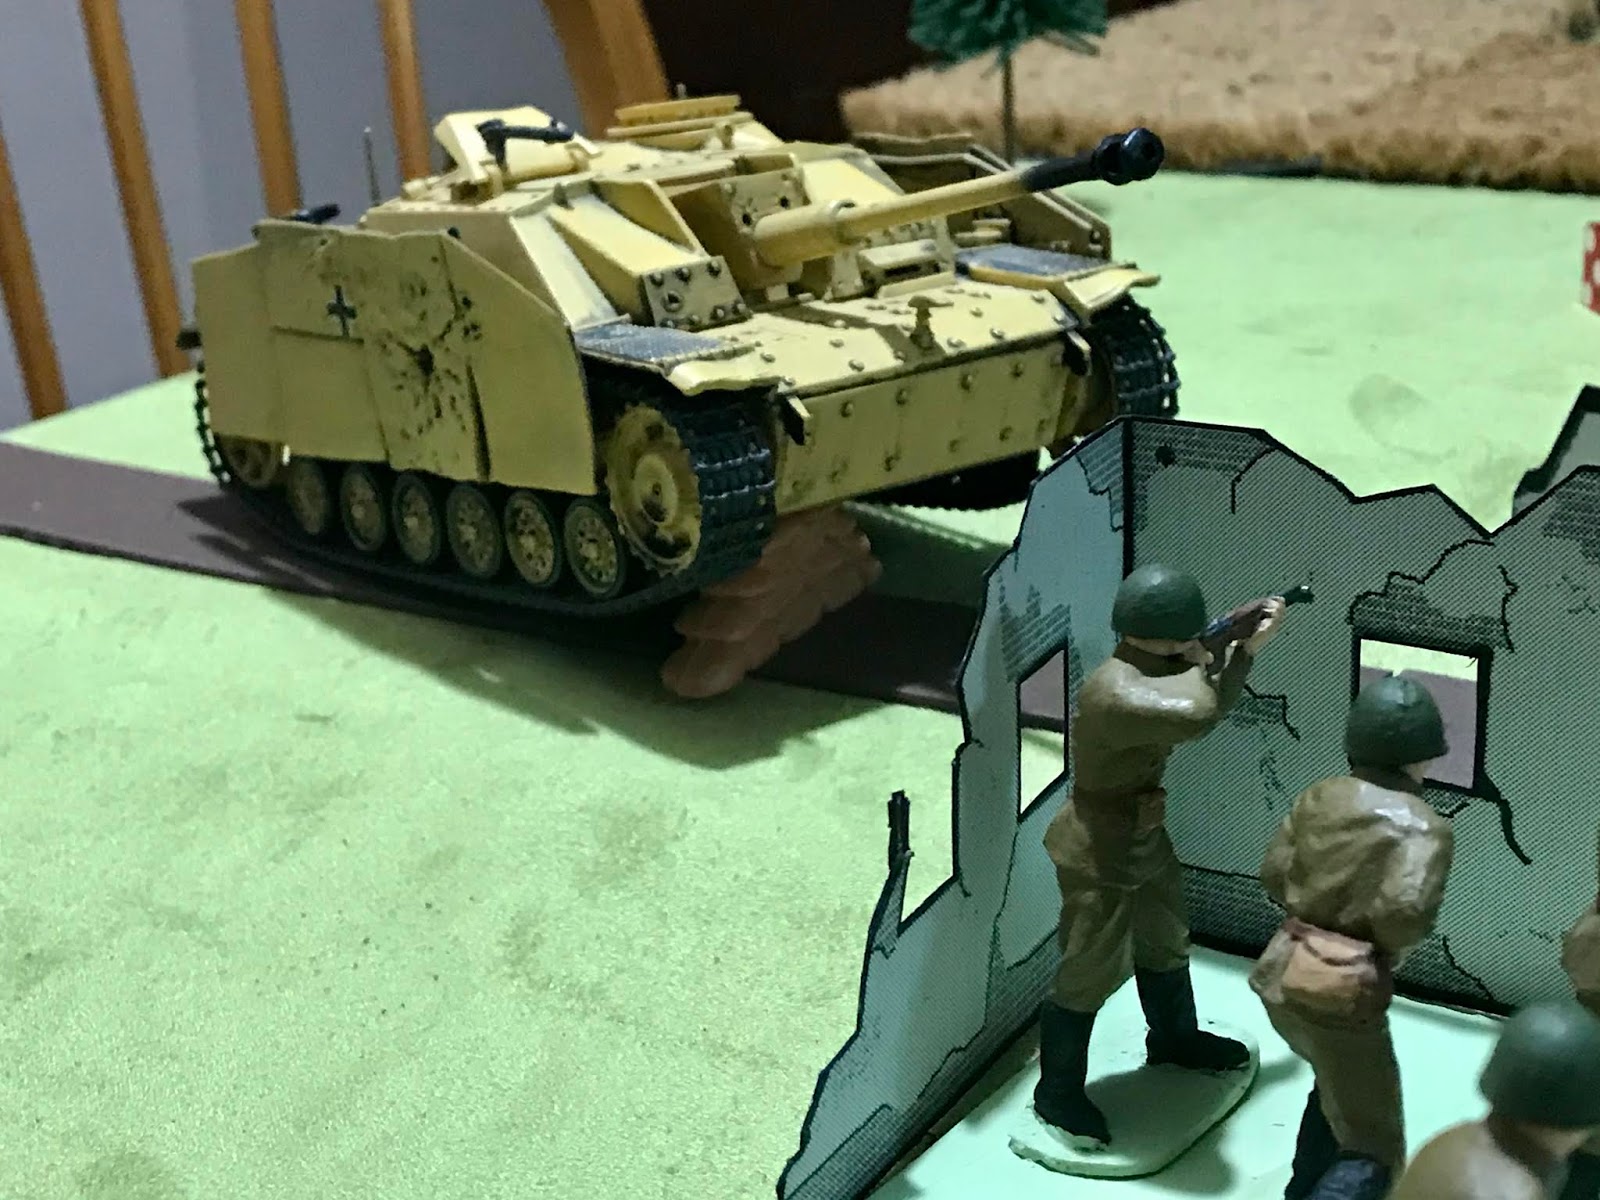
StuG Smuggling with G Company

I had some time Friday night (tonight as I write this) and really wanted to break out my 1/32 StuG. It's a beautiful model / toy by 21st Century that I almost never use as I have no other 1/32 armor.

In any case, the scenario, "Stug Smuggling", is another one for Crossfire - this time from Lloydian Aspects - converted to a 6 x 10 grid for use with G Company.  I played it a few years ago, using Blitzkrieg Commander and I think, Bob Cordery's Portable Wargame: Modern, which was on his blog long before the books came out.

The scenario and forces were essentially as written, except I substituted Soviets for British and I don't have a StuG III, so a IV it is. The gist is that the Germans have to get the StuG to the opposite side of the table - infantry are expendable. The Soviets have to stop the StuG or they lose. If they stop the StuG but have less than five infantry stands remaining (including the ATG), it's a draw.

The Soviets have AT grenades but they do not have any ATRs, so they have to either use their ATG - which depends on the StuG moving towards it - or close assault the StuG - not a great prospect.

Finally, the scenario name sounds to me like a euphemism for a Speedo, much like "banana hammock." (Let that thought just settle into your brain.)

***

Sneaky StuG.
Overview of table layout, end of turn 1. The Germans were pretty cautious - keeping the StuG and infantry together.

Soviet anti-tank gun. This experimental ATG is simple enough that even a sniper and a Forward Observer can operate it. Glorious socialist engineering!
The Germans approach the village- the StuG has gotten a little  ahead. Soviet fire from across the road hampers the German infantry near the top of the picture. The Germans are elite, so they aren't worried.
Infantry fire-fight in the village. Soviet troops in the orchards opposite the church give the Germans trying to rush across the road pause.
With the Soviet infantry losing the firefight, the StuG attempts to overrun the obstacle in order to get around the woods that were blocking its path. Instead it is lodged there.
The smoking wreck of the StuG - destroyed when close assaulted (I rolled a 1. It was outnumbered and was being attacked from two squares, so -2 on the roll for a -1 over all. The Soviet units were both disordered in the attack but not destroyed).

The Soviets lost three squads total from the two forward platoons and the ATG crew, but finished with six rifle squads and a mortar crew. The Germans lost two squads of their six, and, more importantly, the StuG. Soviet victory.

***
This was a lot of fun. I felt like I had a lot of hard choices to make and some worked out and quite a few didn't and those were mostly poor choices on my part, like running across open ground to frontally attack a good order StuG.

It was nice to just play not play test, although it was inevitable that I'd try some things. The new close combat - which is less deadly - worked as I hoped.

Since all of the Germans were elite, I was able to remember that this time, and found them almost impossible to eliminate when in cover. If they weren't hit multiple times in the same turn, they'd invariably rally at the start of the next (not a bad thing, just an observation).

The StuG functioned as a mobile heavy MG in this game- and why not, they get two d6, keep highest, when rolling as an MG against infantry - and they were effective that way, but I rolled terribly to cross that obstacle (I used the scenario rules for that). None the less, had it succeeded,even i it raced across the table, it would run into the waiting Soviet 3rd platoon with little to no infantry support, since their escort was bogged down in the village most of the time.

I found that my dissatisfaction with the turn sequence just wasn't there when I played today. So it will likely stay as is in my current draft which should go live this month (I know I said that last month, but things happened).

Wednesday, December 4, 2019

War of the Rats and SoloCon Wrap Up

Saturday night, I spent about an hour walking through a tutorial on using demolition charges, flame throwers, and machine guns in Advanced Squad Leader Start Kit in preparation for playing the second scenario included in the #1 box: War of the Rats.

This scenario has the Germans trying to capture some key buildings in 1942 Stalingrad. They outgun the Soviets in every possible way - including the aforementioned demolition charges, flame thrower, and machine guns.

The Germans closed fairly quickly - suppressing the Soviets with prep fire from the MGs and placing smoke grenades to cover their advance. They focused on taking one objective at a time, rather than spreading the force too thin attacking all three at once.

In retrospect, my initial Soviet defense could have used some work. This walkthrough gives some advice that I'll apply next time.
Even with reinforcements, which arrived on turn 3, the Soviets were on the verge of collapse. Or so it seemed.

As the Germans advanced, I had the Soviets fall back until eventually they formed a defensive line to protect the final objective. There they put up a last stand worthy of the ages - pinning and breaking Germans on nearly every die roll.

A final push by the Germans to close assault the objective -something I thought would be a slam dunk - led to their being ambushed, which resulted in the loss of a leader and three multi-man counters to a single good order Soviet MMC and a 9-2 leader at 1:2 odds (the two broken Soviet MMCs only participated in the defense not the counter attack)!

The game ended on turn 5.5 with the Germans unable to take, let alone occupy the final objective.

I started late and finished around 3AM, so by the time I woke up Sunday, it was time to return to the real world of grocery shopping, ignoring the 17 tons of leaves covering our yard, cookie baking - it's the holiday season after all- and dad life, when my son returned from his holiday excursion Sunday night.

******

In addition to playing all of the games, I watched quite a few movies. Not all of them relate to gaming interests, but I thought I'd list them anyway:

Is Paris Burning? (Amazon Prime)
Operation Crossbow (Turner Classic Movies)
Panfilov's 28 (Amazon Prime)
Niagara (Turner Classic Movies)
Kansas City Confidential (Turner Classic Movies)
The Mask of Dimitrios (Turner Classic Movies)
The Shop Around the Corner (Turner Classic Movies)

Is Paris Burning? is a phenomenal film that I can't speak of highly enough. It's about the French resistance in Paris just prior to the city's liberation from the Nazis. However, Niagara, is Marilyn Monroe's first appearance in Technicolor - so that alone ties it for the top spot (it's also a good noir. I used to live in Western New York and visited the Falls too many times to remember, and it was fun to see places I knew, only as they were decades before I ever saw them). 

Panfilov's 28, while not the best Russian war movie I've seen, is a gripping last stand scenario and is ripe with wargaming inspiration - plus if you like tanks, there are a ton of them. Finally, The Mask of Dimitrios featured Sydney Greenstreet and Peter Lorre, and I just automatically love everything they do (I often joke that Sydney Greenstreet is my spirit animal).

There was an other  movie I watched, starring Katherine Hepburn, that I can't recall the title of and I did not enjoy all that much - to my surprise as I generally like everything I've ever seen her in. Frankly, I think I watched the whole movie only because I expected it to get better at some point, but it never happened.

Sunday, December 1, 2019

Morschauser Moderns + One Hour Wargames Scenario 13: Escape.

The situation: it's early 1943, a German unit is pulling back to regroup after a strike into Soviet territory and are trying to outrun the Soviet forces  in the area.

The Soviet commander(Red army in the scenario and life, played as "my side") has three infantry platoons all with AT grenades, one of which has squads armed with PTRD-41s, a mortar platoon (three M1938's), and an HMG platoon (3 maxim teams), and a platoon of T-34/76's.

The German commander (Blue army, also played by me but aided by chance cards, so the non-player side) has four infantry platoons armed with AT grenades,one of which has an ample supply of panzerfausts. They also have a mortar platoon (3 81mm mortars) and a platoon of Panzer IVs (Ausf F2)


Lone platoon with PTRD take position by a rode running North-South.
The German Force appears on the horizon to their North . The Panzers see them and open fire.
A Soviet infantry platoon and some T-34s arrive on the German left.
AT grenades and Panzerfausts are brought to bear and the T-34s to a one are turned into smoking wrecks.
The German race down the road continues. Soviet reinforcements - a portion of the battalion heavy weapons company - arrive North of the woods - too late to do any real good there.
The Soviets fire their PTRDs at the Panzer column in ambush style from the woods. But, to no one's surprise, it's not enough to bring down the whole lot.

The Soviet  HMG and mortar platoons arrive too late to the fight South of the woods and suffering ammo shortages German infantry eliminate the remaining Soviet infantry platoons while the remnants of the Panzer platoon escapes - followed by the remaining infantry and mortars.

An exciting little encounter that was a joy to play.
 ****

As mentioned above, the rules were Morschauser Moderns. I used the roster option as written, except with 3 strength points for the tanks rather than 2 to reflect three tanks per model

Initiative was a method taken and modified from the first edition of Two Hour Wargames Six Gun Sound. Use a deck of cards, assign red to one side, black to the other. Draw two cards. If both are the same color, then that side goes first. If different, higher card goes first. If different colors but same value, then maintenance tasks only that turn.

I have modified the rules to fit the scale of 1 base = 1 platoon where 1"=30 yards, rather than 33 yards (40 would work too I suppose) for ease of math, and the weapons ranges were updated to reflect that scale - although rifles stayed at 15" since that works out to 450 yards, a pretty solid effective range for rifles.

But for other weapons, except for infantry tank weapons, a lot of the table was in range most of the time.

In addition, since Morschauser includes no mention of cover, per previous discussions on this blog about that fact, I lifted Featherstone's saving throw rule from his "A Simplified Set of Rules for Modern War Games" as appearing in War Games: Battles and Manoeuvres with Model Soldiers.

Finally, I added a rally rule - At the start of each turn for each unit that has lost strength points but is still on the table, I rolled a single saving throw. If it succeeds they get one point back.


The scenario was number 13 from One Hour Wargaming - chosen because it's one of the one Neil Thomas recommends for solo play. I played the Soviets as "my side" and did my best for the Germans, but used chance cards to give the Germans advantages.

However, rather than using Neil Thomas's method, I used a method taken from Chronicles of Blood : a d4 is rolled each turn and on a 1,  a roll is made on a second table. The events I used on the second table came largely from Neil Thomas's list in the solo games chapter in OHW. However, all of the events were framed as positive benefits for "my enemy" - so nothing to thwart their advance would occur, but plenty could happen to make my life difficult.

Fortunately, I only rolled a 1 twice - but they had their intended effect, like when at the end of the game, an ammunition shortage held up my MGs and mortars from firing that turn.

I changed the turn limit to 10 turns, as Morschauser tends to play fast (as do the OHW rules for that matter) and the game ended on turn 9.

One final note, I played this on a 4' x 4' table because it was out and setup. A 3' square as intended with OHW scenarios would work just as well and might have improved the odds in my favor - my reinforcements would have had less distance to traverse to be brought to bear. Of course, the Germans would have had less table to cross as well.