Showing posts with label AFVs. Show all posts

Tuesday, August 4, 2020

I Am Not Good at Leaving Well Enough Alone

As an inveterate rules tinkerer, I decided to make some changes to my own grid-based battalion per base rules - particularly regarding effects vs armor (I didn't like that mortars could eliminate tanks). However, I made some other tweaks, that, frankly, broke the game in some respects during play testing.

So here are some pictures while I reset some of the changes. Please note, the game pictured does not count towards the campaign, although it is the Cherkasskoye, July 5, 1943, scenario I posted.

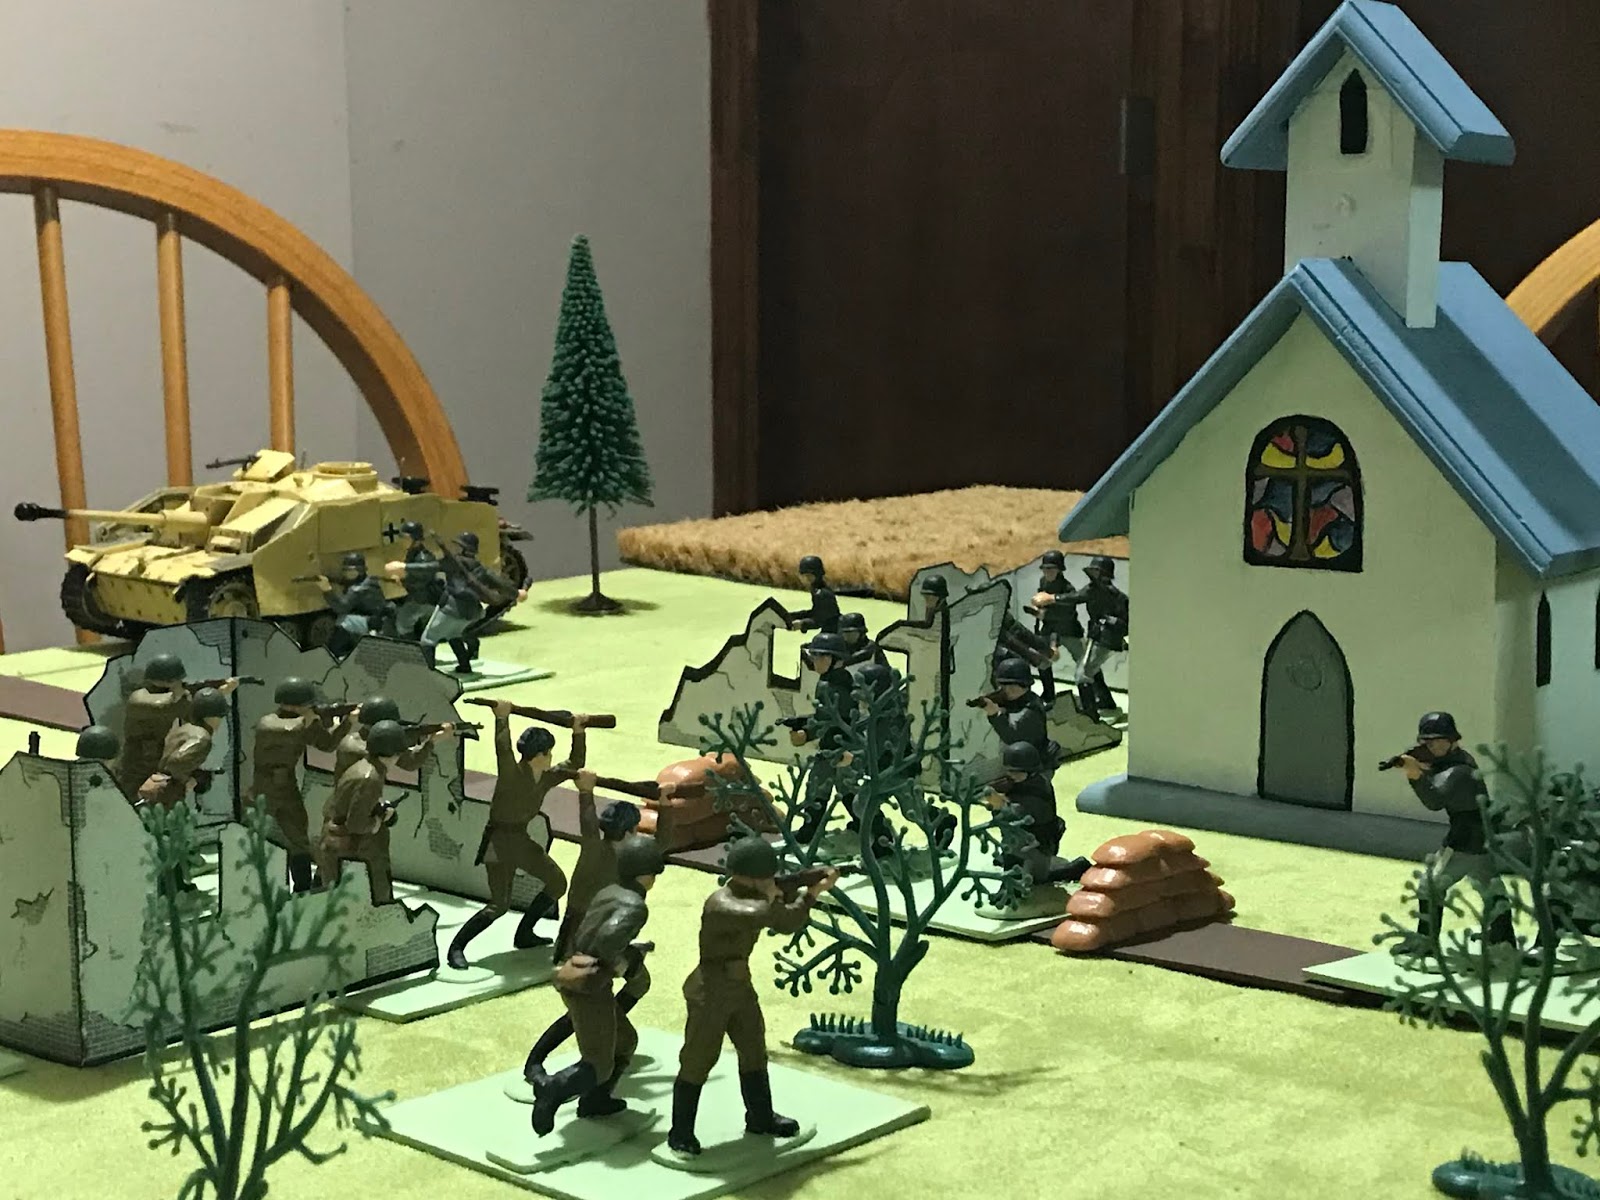
I/PzGr, and I and II/Pz advance up the middle, while Recon races up the road. All units encounter fierce Soviet resistance, but the Soviets on the German right collapse, opening the advance on that flank.

With their lines breached, the commander of the 67th Guards Rifle Division orders two ATG batteries to provide support for the 199th, as it falls back towards the town.

To say things don't look good for the Red Army is an understatement.

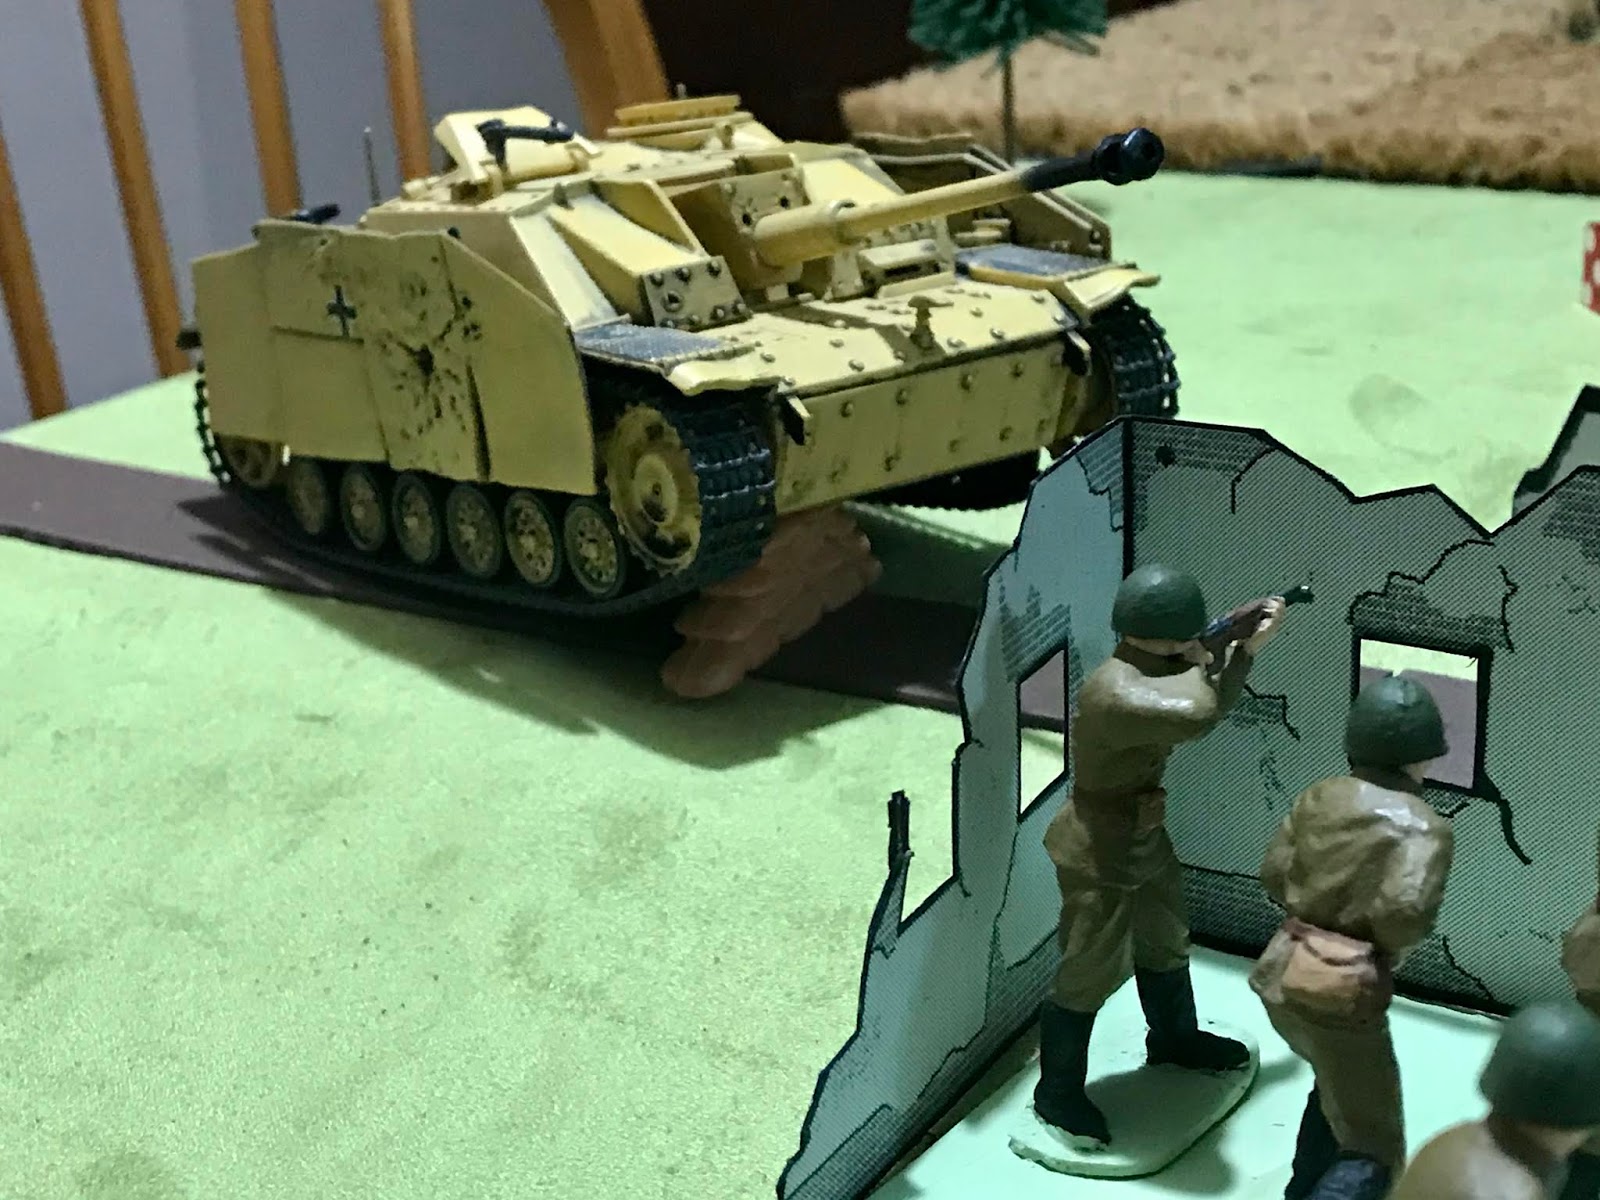
Another view of the same scene. This is my favorite picture of the night.

The Soviet side of the line.

I and II/Pz reach the village, swinging to the left flank, and engage in a shootout with ATG batteries (the 1st was destroyed by combined artillery and I/Pz fire)

Recon arrives on the right flank and I/PzGr advances in preparation to storm the town. (Yellow dice are my "Overwatch" markers. It did them little good,)

It was an overwhelming German win, and a victory for GrossDeutschland , as there was no need for 11th Panzer Division's support.

Friday, January 31, 2020

Battalions and Regiments! Oh my!

As I continue work on my Eastern Front WWII forces, I've been playing around with the idea of fielding WWII games with a company per stand and a battalion or more per side - both on and off grid .This would let me tackle some larger battles - in theory, in practice they'd be no bigger than a One Hour Wargame "army" one one end, and twice that on the other. Indeed, many people treat the stands in OHW as companies, not the suggested platoons, given the force composition.

Nominally, for the sake of building my forces, I'm treating a stand, gun, or vehicle as a platoon - this means I'l have enough variety to field just about anything for squad vs squad (unusual, given my figures are based two to a base) to a battalion or two where 2 infantry bases or 1 gun/vehicle equals a company. I'm using TO&Es from the GHQ WWII TO&E series available on wargamevault to guide this process by the way, and prevent me from buying everything that catches my eye (my empty wallet helps limit the acquisitions too!)

Anyway, here is some goofing around just setting them up on the table to get a look at the idea of two base companies (4" base frontage for infantry)- my Soviets are not following doctrine for deploying in depth by any means:

Dark grey PAK is 21st C. / Unimax / 32x / Ultimate Soldier
Above, two Panzergrenadier battalions with two companies of PZ IVs prepare to attack a Soviet rifle battalion with artillery support and a battalion of T-34s. And here is a close up of one of the battalions:

Mortar is 21st C. / Unimax / Ultimate Soldier and MG is CanDo Pocket Army. PAK is Italeri 1/32 model. Unpainted crew are CTS. PZ IV's are CTS as well. Soviet ZiS is Italeri 1/32.
In the above picture, the MG and mortar together represent a Panzergrenadier support company (2 MGs platoons, 1 mortar platoon), while the  PAK-40 represents the P/G heavy company (1 ATG platoon, 1 infantry gun, and 1 Engineer platoon, which I admit doesn't make sense given this representation - I am thinking of basing the guns on 4x4 squares, and putting the engineer base alongside)

I decided for giggles to quickly modify Morschauser Moderns and play a game. I settled on 1" = 100 yards (which meant a 400 yard frontage for infantry stands, and adjusting weapon and movement ranges) and played a small game on a 36" x 36" table (representing 2 miles x 2 miles roughly), using the roster option. The scenario was based on my faulty memory of a OHW scenario: a Panzergrenadier battalion had to capture a cross-roads and dislodge the Soviets from a hill, while the Soviets had to hold the hill and capture the cross-roads.


For fun, I decided to break out my transport vehicles, which I don't have nearly enough of, nor do I know anything about how they were used in actual combat situations. Looking at the photos, they're a bit, no make that WAY too spread out for battalion frontage I believe - but this was just a proof of concept so I'll forgive myself.

A mix of vehicles including 21st C., Marx (yes, it's a US vehicle. I was desperate!), Deetail, and CTS. The PAK next to the transport is a convenience to take up less space - this is how I'd do it in a square, but really it's trailing the vehicle
None the less, non-combat transports probably shouldn't move into small arms range of the enemy before disembarking their troops!

In any event, 1st and 2nd P/G companies race forward and attack the hill:

2 P/G companies with support attack the Soviet support companies - in this case the Britain's gun is playing the role of a Soviet ATG battery (of 2 ATG platoons). The kublewagen is for transport only - it's MG is not part of the fight. Ditto for the Sd.Kfz 251s MG, which snapped off anyway.
The Soviets sent three infantry companies on foot to take the crossroads from 3rd P/G company, who was supported by the battalion's heavy company:

I had a hard time remembering that the rifle company range was 6"(remember it includes all rifles, lmgs, and support paltoon weapons including any light mortar if present) and not the 9" spotting distance (these ranges come from a set of company-per-base rules which I'll talk about in its own post and work well with 1" = 100 yards).
At the hill, the Germans were driven back handily and the crossroads fell to the Soviet attackers in close combat (Morschauser close combat is deadly and gun bases have very little melee power).


*****

I realized when all was done that I had forgotten my morale recovery rule, used back during my Thanksgiving SoloCon. Perhaps the game would have gone longer than 30 minutes if I had remembered!

In any case, visually this game worked for me (ymmv) - I would go so far to say it felt more "toy soldiery",  which is always a  plus in my opinion. The feeling was no doubt aided by wonderfully simple rules, and by the presence of the transport vehicles, which look both wrong in a practical sense (they're like 600+ yards long) and right in a smiles sense. I found I had no problem thinking of 4-figure bases as companies (perhaps because that's how many other people game in other periods, if not WWII) and that confirmed for me I'm on the right track with this idea.

I think a grid might be even more effective, particularly when buildings are involved, but I haven't tried yet - I can definitely see using the Portable Wargame for this kind of thing if I go down that road. As for the rules I used this time, I have some thoughts for another post.

Friday, December 6, 2019

StuG Smuggling with G Company

I had some time Friday night (tonight as I write this) and really wanted to break out my 1/32 StuG. It's a beautiful model / toy by 21st Century that I almost never use as I have no other 1/32 armor.

In any case, the scenario, "Stug Smuggling", is another one for Crossfire - this time from Lloydian Aspects - converted to a 6 x 10 grid for use with G Company.  I played it a few years ago, using Blitzkrieg Commander and I think, Bob Cordery's Portable Wargame: Modern, which was on his blog long before the books came out.

The scenario and forces were essentially as written, except I substituted Soviets for British and I don't have a StuG III, so a IV it is. The gist is that the Germans have to get the StuG to the opposite side of the table - infantry are expendable. The Soviets have to stop the StuG or they lose. If they stop the StuG but have less than five infantry stands remaining (including the ATG), it's a draw.

The Soviets have AT grenades but they do not have any ATRs, so they have to either use their ATG - which depends on the StuG moving towards it - or close assault the StuG - not a great prospect.

Finally, the scenario name sounds to me like a euphemism for a Speedo, much like "banana hammock." (Let that thought just settle into your brain.)

***

Sneaky StuG.
Overview of table layout, end of turn 1. The Germans were pretty cautious - keeping the StuG and infantry together.

Soviet anti-tank gun. This experimental ATG is simple enough that even a sniper and a Forward Observer can operate it. Glorious socialist engineering!
The Germans approach the village- the StuG has gotten a little  ahead. Soviet fire from across the road hampers the German infantry near the top of the picture. The Germans are elite, so they aren't worried.
Infantry fire-fight in the village. Soviet troops in the orchards opposite the church give the Germans trying to rush across the road pause.
With the Soviet infantry losing the firefight, the StuG attempts to overrun the obstacle in order to get around the woods that were blocking its path. Instead it is lodged there.
The smoking wreck of the StuG - destroyed when close assaulted (I rolled a 1. It was outnumbered and was being attacked from two squares, so -2 on the roll for a -1 over all. The Soviet units were both disordered in the attack but not destroyed).

The Soviets lost three squads total from the two forward platoons and the ATG crew, but finished with six rifle squads and a mortar crew. The Germans lost two squads of their six, and, more importantly, the StuG. Soviet victory.

***
This was a lot of fun. I felt like I had a lot of hard choices to make and some worked out and quite a few didn't and those were mostly poor choices on my part, like running across open ground to frontally attack a good order StuG.

It was nice to just play not play test, although it was inevitable that I'd try some things. The new close combat - which is less deadly - worked as I hoped.

Since all of the Germans were elite, I was able to remember that this time, and found them almost impossible to eliminate when in cover. If they weren't hit multiple times in the same turn, they'd invariably rally at the start of the next (not a bad thing, just an observation).

The StuG functioned as a mobile heavy MG in this game- and why not, they get two d6, keep highest, when rolling as an MG against infantry - and they were effective that way, but I rolled terribly to cross that obstacle (I used the scenario rules for that). None the less, had it succeeded,even i it raced across the table, it would run into the waiting Soviet 3rd platoon with little to no infantry support, since their escort was bogged down in the village most of the time.

I found that my dissatisfaction with the turn sequence just wasn't there when I played today. So it will likely stay as is in my current draft which should go live this month (I know I said that last month, but things happened).

Saturday, June 22, 2019

Skirmish Campaigns: Grandcamp (Bloody Omaha Campaign, Game 3)

Friday night I fought the third and final battle of the Bloody Omaha campaign from Skirmish Campaigns:Heroes of Omaha and Panzer Lehr. The scenario is called "Grandcamp."

The scenario is set on June 8, as the 3rd Battalion of the 116th Regiment, 29th Infantry Division, made its way west of Point-du-Hoc and encountered elements of German 1st Battalion, 914th Infantry Regiment, 352nd Infantry Division.

The battle field. US enters from the right.
The US objective is to move from east to west (right to left in the picture) and either capture the farm or exit a portion of the troops off the west edge. If they can do both, they earn a decisive victory. The Germans win by denying the US their victory conditions, and earn a decisive victory if a certain percentage of their troops survive the encounter.

The Germans, off map, awaiting their deployment. 
The PL and the rifle squad held the farm (I played the scenario twice - this report is the second. In the first game my blinds were too random and the Germans were scattered in ways not logical for winning the scenario. I also forgot a few scenario rules, and that the MGs were light and medium, not heavy).

Converting the order of battle, the Germans have a Platoon Leader, a rifle squad (each man armed with a panzerfaust -8 in total), an MMG team, an independent LMG team, and a PAK38 and crew. Lacking a PAK38 model, I used one of my Britains guns for a "close enough" match.

US advance is underway and cautious.
The Americans had a PL in jeep, one Sherman, an MMG team, a forward observer for an 81mm mortar battery (10 fire missions), and a full platoon of three rifle squads - one with a bazooka.

The US got off to a slow start,with troops taking positions in the bocage trying to see any enemies using the next hedgerow for cover.

German LMG team fires on the American MMG.
On their left, some suspicious greenery turned out to be occupied by the German independent LMG team, who opened fire and pinned the US MMG.

Having revealed themselves, they became a target for the tank, who advanced with the PL in the jeep. A few rounds of HMG fire and the German LMG was suppressed - and then inexplicably I sent the jeep and tank to flank the farm, and moved the MMG up to support the infantry advance on the right (also heading for the farm), leaving the LMG team to try to rally (it took them quite awhile but I would pay for it when they finally did).

PAK crew opens fire on the Americans.
The Germans had a nasty surprise waiting for the American riflemen when they stepped out of the bocage into open ground - the PAK38 crew was pointed straight at them. One of the squads was suppressed (I kind of screwed up my own rules - ATGs can only damage a single unit, they don't damage all units in the space. It wasn't an issue here).

Firing from the safety of the bocage, the US rifles shot up the PAK crew with ease and then moved quickly, and recklessly towards the farm.

Tank assault on farm as infantry move up under fire.
The infantry advanced straight into the line of fire of the German HMG, located in the fields north of the farm. Simultaneously, the American Forward Observer called down fire on the farm - and would do so repeatedly for 8 fire missions.

The Sherman and jeep, far more cautious than the infantry, moved slowly down the road revealing some blank blinds and then set sights on the farm.

A shoot out between the Sherman and the Germans inside the farm began - and while the Germans did manage to score a suppression eventually with their Panzerfaust, it was too little, too late and once rallied, the tank's main gun suppressed them in time for a heavy mortar barrage to rain down and take them out.

Sherman destroys German barbed wire.
 The US infantry got hung up a bit German MMG and the rallied LMG that eventually made it to the fight. Amazingly, the LMG team ended up suppressed and then close assaulted, still won its close assault and destroyed their attacker.

It took some doing, and the US lost two squads and their MMG as casualties, but  once both German MG teams were suppressed, the remaining US squad occupied the farm, while the Sherman cleared the way for the US to advance to the west. The German position became untenable.

The US force continues their advance.

The US made it off the table and I called the game a US victory after 8 turns of the allowed 12.

Since they could not both hold the farm and exit enough troops to satisfy both victory conditions, it wasn't a decisive victory, but it was enough to win the campaign.

****
While playing I found a few problems in my QRS, so I took the link down while I fix those. Also, for the first time I had runs of cards for one side or the other near double digits. This is fine for me,as I play solo, but clearly it's not something that would fly for two player games.I need to think on that a bit.

Overall, the campaign was a lot of fun, my rules gave enjoyable games even though they still need tweaking. The vehicle rules worked well - although I feel like tanks should be more devastating, so there may be more changes there. That said, I'm looking forward to playing the Crossfire 2x2 scenarios some more, and vehicles don't make an appearance there, so it may be awhile.

Tuesday, June 18, 2019

Tanks a bunch!

Tanks are full of problems when all you originally had in mind was a relatively simple infantry game to play engagements between companies or so per side, where tanks generally would be pretty scarce (think Crossfire scenarios).

Why are they so troublesome you ask?

Because it turns out once you start thinking about tanks, you have to start considering other vehicles that might come into the game and how the rules will work for them. After all, it does no good to have a completely different mechanism for different vehicle types. And, to no ones surprise, there are lots of kinds of vehicles: motorcycles, wheeled, tracked, half-tracked, armored, with and without mounted weapons of their own, those with rotating turrets, those with fixed-turrets, etc.

It's enough to really clog up the brain with options and we still haven't mentioned gun size, armor thickness, penetration depth of anti-tank charges, sloped vs flat armor, etc. And, oh wait, how fast do they go?


This Solido Panzer IV and Deetail paratrooper on this way too small grid have helped me figure quite a bit of this all out.

It should be no surprise that I've gotten lost in the weeds a few times. The weeds being the Internet, where experts and non-experts alike offer opinions, facts, and complete hearsay about vehicles in WWII.

That said,I *think* I am getting there, and with only minimal additions to the existing rules for infantry - well at least in terms of the mechanics involved.

EDIT: Almost forgot, came across this interesting resource German Tank Maintenance in WWII.

Thursday, September 1, 2016

Catch a Tiger by the Tail

My newest acquisition for my German WWII force is the Solido 221 Tiger tank.


Collectors may choke a bit when they realize I'm going to play games with it.

It's a thing of beauty!

Size comparison with 54mm Matchbox figure

Another perspective.


I admit that my 1/43 - 1/50 armor acquisitions for the Germans are a bit of a hodge podge: a PZ IV, a Jagdpanther and a Tiger. Then again, the rules I use don't put a premium on real-world orbats either.

I think, at this point, my plan is to acquire another PZ IV, so I can field a tank company of PZ IVs, lead by a Tiger. Not sure how historical it is, but Featherstone had two Panthers lead by a tiger in his sample campaign game in Advanced War Gaming and that's good enough for me.