Monday, March 29, 2021

Crossfire 2x2 : The River

I had another go at Crossfire this weekend. This time, I fielded a scenario that gave me fits when played with my own rules - The River. It works much better using Crossfire! As a note, my table is 3x3, because the bases are 2" x 2", which is slightly larger than standard.

Pictured below is the second game - the first wasn't supposed to happen, I was just setting up the table late Saturday night, in advance of Sunday's game, and thought, "Well, maybe I'll just move some stands around for fun." Before you knew it, I had played an entire game.

 The Germans got off to a poor start - no smoke landed and their recon by fire failed.

So the Soviets popped up with their MG and started firing. Fortunately for the Germans they were mostly ineffective.

After several short initiatives of failed smoke arrival, the Germans managed to land some which allowed the river crossing to begin. That brought the Soviets in the bunker into the action.

The German engineers walked right into the minefield and started clearing it. Fortunately the Soviets in the bunker were incompetent.

I didn't feel like getting out the cotton batting to set up the smoke so I used these "markers" I created years ago. I think they fit the look of my table.

With the mines cleared, and with some help from their 50mm mortar landing smoke,the Germans were waded their infantry into the river.


 The Soviet mortars gave the attackers some trouble when the smoke cleared

But using the woods as cover, the Germans were able to storm the building. Fierce close combat followed. In the end, the defenders were wiped out to a man: heroes of the Motherland, all.

I used the Bogged Down markers to indicate "no fire".

The Soviet FOO and mortar turned their attention to bombarding the formerly-held building.

While the Germans launched an attack on the bunker, supported by their mortars.

Having cleared that obstacle, they moved on to capture the Soviet FOO and wipe out the Soviet mortar in close combat.

End of the game,the Germans held the objective and the Soviets were completely eliminated.

As a solo game, Crossfire, like most games, works well- although the hidden units in these scenarios takes a little effort to setup in a satisfying way. I think the hardest part about solo play with Crossfire is the need to always be aware of when the inactive side has an opportunity for reactive fire. Unlike some games, where a missed opportunity for reactive fire isn't the end of the world, in Crossfire it's the difference between stealing the initiative and not getting a chance to be the active side.

The solo player is forced to dedicate some brain power to examining every action from the perspective of both sides. It's not insurmountable, and I find the mental involvement enjoyable, but I can imagine some solo players would find it less so.

Wednesday, March 24, 2021

Austrians Begin to Muster

There's not much to see yet, but the painting process is underway for my Armies in Plastic WW1 Austrians (which are just their late war Germans in a different color plastic). 

The coal scuttle helmet was introduced on the Southern Front in 1916. If I recall correctly, the sturmtruppen used it first, but it soon spread to the entire army. Because all of the figures wear coal scuttle helmets, equipment and poses will distinguish the stormtroopers from the regular infantry.


Only two of them rock a mustache. I find this shocking.

I tried something different this time: using a candle to heat a pin, which was mounted in a hobby knife handle, to remove mold lines. Honestly, I'm not sure it's worth the effort or if it is any better result than my usual hack job with a knife. 

Figures were then primed with black gesso. On top of that went a coat of Delta Ceramcoat Hippo Grey because the uniforms will be Vallejo 905 (for grey) or 943 (for the early war blue) and I didn't want to use a lot of paint to cover the black.

I'm also trying something different with the painting this time - normally my process is sort of two steps forward, one step back, with lots of touch-ups on previously painted bits. Hopefully, spending a little more time on each individual step on caution will result in less time spent overall.

For basing, they will be based in pair on a 2" x 2" square -same as my WWII Eastern Front collection. 

This will suit Trench Hammer where the bases are "sections" or "patrols". The bases can be combined to form larger units - two bases for a company or battalion for example, for The Portable Wargame or Neil Thomas's One Hour Wargames machine-age rules, or rules of my own devising. Finally four bases together can form a battalion for Field of Battle WWI.


Saturday, March 20, 2021

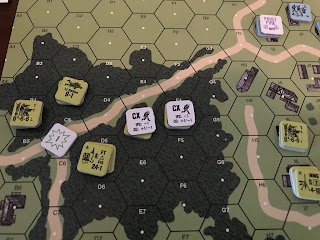
Battle for Moscow

Saturday, while my son was engaged in video game pizza making (I kid you not), I managed to get in two plays of Battle for Moscow.  If you're unfamiliar with it, it's a game ostensibly based on the 1941 German drive to capture Moscow. More than a history lesson, it's intended introduce people to hex and counter wargaming (perhaps I should have started here myself!). 

I first came across it in the wilds of the internet years ago when I was just getting into wargaming, albeit with miniatures. You can view the components or even download the entire game, legally from Grognard.com.

I'm not a fan of printing my own counters - they never feel right to me - so, I've been on the look out for a copy of the game ever since. When I happened to find a copy for $5 at the 2020 Atlanta Military Figure Society Show (one of the last things I did pre-COVID-19 lockdowns but of course, I didn't get around to playing it until January 2021.), I scooped it up.

It's a simple game, no doubt about it. 

Still, it introduces the basics like turn sequences, moving and terrain effects, zones of control, combat and a result table with the requisite odds calculations, step reduction, lines of communication, etc. It has no particular solo mechanisms but as it's an attack-defend scenario, it works well for solitaire play.

Initial setup locations are printed on the map. All of the Russian units, save one, are the same, so their setup doesn't matter. The Germans have more options and it does matter.

A later turn illustrating the step-wise reduction of unit strength.

I rather like it as a way to get in a quick game when I have time, but not time enough for anything involved. It has a minimal number of pieces, it's quick to setup, and the rules are quite short. Even O.G.R.E. Pocket Edition feels more complex!

Wednesday, March 17, 2021

Scenes from Some Crossfire Games

I finally tried Crossfire - using the 2x2 Small Crossfire scenario "The Farm" - and I have to say, I wish I hadn't taken so long to try it!

Due to the small scenario size, I was able to play three times, over a total of two hours. The first game was very much a nose in the book game. The second and third were decidedly less so. The rules are not complex, but some things will trip you up if you fall back to your default interpretation of concepts such as "group move". 

In Crossfire, initiative is held until lost or given away (unlike most games), so, maintaining the initiative is crucial to getting things done. As a result, the player has to think ahead a little, as well as weigh the likelihood of success and failure of a given action. This is fun and involving decision making, rather than tedious and off-putting.

Movement is from terrain feature to terrain feature, no rulers required. As someone who prefers grid-based gaming for that reason (among others), this appeals to me, but it does mean you need a lot of terrain. That's something my toy-soldiery tables tend to lack, but fortunately the small scenarios are manageable with fairly minimal terrain. That said, I still need to make more.

The images below are from all three games, I think. The Germans (attacker) won two of the three. In the second game, the Germans rushed the farmhouse before they knew what was inside. It was the Soviet MG - who had a field day mowing down the enemy. HE fire made the victories possible in both cases by suppressing the farmhouse occupants.

Smoke screen size varies according to the source.

Engineers lead the way.

The farmhouse - the enemy within was always randomly determined. And was the MG in all cases.

Close combat in Crossfire is brutal and it's possible for an outnumbered side to win. Not this time.

While the objective was the farmhouse there were other elements on the table. In this case, the Germans managed to capture the Soviet FOO and engage the support squads who could have contested German control of the farmhouse. It was not to be.

There is the need for status markers - which, while not my favorite thing, is just something I've learned to accept. The rules are also kind of expensive(around $28 USD) if you just look at the production values - a reprint from a scan (these rules are old). However, the contents are well worth it.

In the US, they're available from On Military Matters (I order from them at least once a year - great service) and Caliver Books in the UK (I've only ordered from them one, but also great service) .

Monday, March 15, 2021

Simple Equation Redux (ASLSK)

Rather than move on to play scenario 4 in the Advanced Squad Leader Starter Kit (ASLSK) #1, I opted to try scenario 3, "Simple Equation" a second time. My goal was to apply lessons learned in scenario 2 (War of the Rats) and the first attempt at scenario 3.

This is the board at the end of the game:

End of game - turn 6.5
Two massive melees cleared the Germans out of the middle collection of buildings. Although I just barely got the US onto the top half of the map, I declared this a US victory. 

Although they had several squads reduced by either quality or casualties, the Americans were still a company+ strong at least in terms of unit count. On the other side, the Germans finished with a platoon of two regular and one conscript squad with an 8-0 leader on the left and a lone squad on the right.

I definitely learned my lessons from last time for the Americans - I concentrated my force in the middle and avoided the killing grounds on the left and right, used smoke a LOT, and advanced even if I couldn't always pin or break German units with LOS to the spaces the Americans were moving through.

In retrospect, I could have done one or two things different for the German deployment, although I don't think they'd change the outcome. More importantly, rather than fighting the Americans for every inch of ground, I should have fallen back to contain them and deny them the victory. 

Still, the Americans have better quality units, more of them, better leaders, and better squad weapons. Ultimately, this scenario is the Americans' to lose (like they did last time).

Sunday, March 14, 2021

Somewhere in France, 1944 - Panzer Kids!

As noted in my last post, my son and I were set for another game of Panzer Kids. The game took place Thursday night. The scenario: a big cat (Tiger 1) was on the hunt for allied mice (three Shermans), aided by a Panzer IV. 

Both sides made good use of the cover provided by the countryside.

A shoot out - two Shermans engaged the Tiger.

The Tiger took damage quickly and was rendered largely useless.

The Panzer IV on the other hand ...

... scored the first kill of the game.

The Allied tanks again ganged up on the Tiger and this time knocked it out for good.

The young general surveys the final carnage with smug satisfaction.


The cat's eyes were too big for its stomach!. 

Despite the abundance of cover, the Allied commander opted to turn the hunter into the hunted and did so boldly. It paid off, this time.

**********

The optional rules worked quite well The bocage rules also worked as I hoped - allowing the Allies to keep one Sherman in reserve to strike when the Tiger was vulnerable, and the PzIV to advance up the table (with it's weaker defensive value, this was a huge plus).

My son immediately asked when we could play again, which is the highest possible praise for a game.

This is our third Panzer Kids outing I think? I may have said it before, but it bears repeating, I highly recommend Panzer Kids - don't let the Kids part turn you off. There's an enjoyable game here for adults, too.

There's a pay-what-you-want Basic version if you want to give it a go to get a sense of the rules, but the Deluxe edition rules add some of the features older gamers would expect (flank/rear bonuses, damage effects, ATGs, etc.) without adding complexity - plus there's quite a list of tank stats. 
I think this game took 45 minutes start to finish. It's hard to tell exactly how much of it was the game though, because there were quite a few tangents - such as extended sound effects making for shots that hit (or missed for that matter), wild cheering and "end-zone celebrations" for successful shots, random hugs, spontaneous improvised "national anthems" to spur on the sides, etc. - not atypical if you've ever had the good fortune to game with a nine year-old.

Thursday, March 11, 2021

The Table is Set!

The table (err, bed) is set for the next game of Panzer Kids Deluxe! This time we'll be "somewhere in France, 1944". If we keep playing this game I'm going to have to expand my collection of 1:48-1:50 scale armor. HAVE TO I SAY!

Tanks not necessarily in their starting positions.

I just like the way this Corgi model looks going into the field.


 Vehicles are Solido / Verem and Corgi.

This game we'll incorporate the optional damage rules, wreck rules, and the flank/rear attack rules. 

For the bocage/hedges, I've decided that the tanks must be in contact to see/be seen and to shoot/be targeted, otherwise it blocks LOS. Tanks may not cross bocage/hedges.

Tuesday, March 9, 2021

Otranto 1917: Early Stages

I'm about 3/4s through reading The Battle of the Otranto Straits:Controlling the Gateway to the Adriatic in World War I by Paul G. Halpern, and perhaps to no one's surprise, this has led to an irrepressible urge to pay a naval wargame. Never mind that outside of "battle ship" and a game or two of the basic version of the Axis and Allies naval game a few years back, I haven't played any.

Image from goodreads.com
The "battle" such as it was a race up the Adriatic with a few shots fired and even fewer causing real damage. It's not exactly a fierce naval exchange. It's also pretty small (Jutland it isn't). Interestingly, both sides fielded flying boats which were useful as reconnaissance, although they were not entirely accurate in their reporting, and far less useful in attacking enemy ships. Subs were present, sort of, but not involved in the main action (though the threat of their presence was a factor in decision making) which means the action is essentially limited to surface vessels and some air support if desired.

It is entirely possible to field nearly all of the ships involved with 1/2400 models from Panzerschiffe . You could field some of them with fancier models from GHQ, but for what amounts to another side show for me, Panzerschiffe is the way to go, if not cardstock.

By way of example and to make this post useful, I have shared below the lists I made. Please note, these are based on Halpern's book - the Wikipedia article puts the Aquila with the Mirabello group, whereas Halpern has it as the lead ship, due to its speed, in the Dartmouth group.

Austria -Not listed are the two M-class torpedo boats, and the pre-dreadnaught Budapest. The former don't seem to be available, and the latter can be had from other suppliers. In any case, they add little, but would be fun to have for "what-if" scenarios.

ShipClassPanzerschiffe Code
NovaraNovaraL-128
HelgolandNovaraL-128
SaidaNovaraL-128
CsepelTatraD-109
BalatonTatraD-109
Sankt GeorgeSankt GeorgeL-145
TatraTatraD-109
WarasdinerTatraD-109
84fF class torpedo boat
D-111
88fF class torpedo boat
D-111

Italian - "Substitions" - such as using the Pilo class for the Sirtori and Indomito classes - are based on readings of posts on The Miniatures Page, Lead Adventure Forum, and others. Also note, the Pilo class is under Panzerschiffe's WWII offerings as they were used in that war, too.

ShipClassPanzerschiffe CodeGroup
PiloPiloD-042 Bristol grop
MostoPiloD-042Brisol group
SchiafinoPiloD-042Dartmouth group
AcerbiSirtori (similar to Pilo)D-042Dartmouth group
AquillaAquilaD-113Dartmouth group
MirabelloMirabelloD-112Mirabello group
RacchiaMirabelloD-112Marsala group
ImpavidoIndomitoD-042Marsala group
IndomitoIndomitoD-042Marsala group
InsidiosoIndomitoD-042Marsala group
MarsalaBixio
L-127Marsala group

 British

ShipClassPanzerschiffe CodeGroup
BristolTown    L-107Bristol group
DartmouthTownL-125Dartmouth group

French (these don't appear to be available, but, in any case, due to their slow speed, don't play a role in the main action in any case.)

ShipClassPanzerschiffe CodeGroup
Commandant RiviereBoucliern/a
Mirabello group
BissonBissonn/a
Mirabello group
CimeterreBoucliern/a
Mirabello group

I haven't ordered any miniatures yet, however, I did start collecting rules.

Bob Cordery's Gridded Naval Wargames had been recommended to me by more than one person, so that was a no brainer. Also of interest are the freely available Archduke Piccolo's Ultra Simple Naval Games.

Both are grid based. The former using squares or hexes, the latter using hexes. 

Martin Rapier has a One Hour Wargame naval variant that looks intriguing, no grid required.

Victory at Sea: Age of Dreadnaughts gets mentioned a lot on discussion boards (or did, some of the messages go back a decade or so) . It's out of print, but there are copies to be had and so I ordered a copy (you can get the PDF on Wargame Vault - the print edition was a little less expensive).  It hasn't arrived yet, but I will undoubtedly post when it does.

I bought a PDF copy of the supplement, Far Flung Seas,  with the Austrian and Italian navies (the print copy of the supplement not being readily available). It happens to handily include a campaign map for the Adriatic with Italian and Austrian bases and targets indicated. I believe the campaign system is included in the main rule book.

Apparently Warlord has released an updated version of Victory at Sea (the WWII version of the rules). Perhaps an update of Age of Dreadnaughts will follow?

Great War Salvo! 3rd ed. was 50% off on Wargame Vault this past weekend, so I grabbed that too. 

It's more of an abstract game, and not minis based. Although based on what I've seen of it, you could use minis if desired. Most of the ships involved in Otranto are not represented on the counter sheets, but there are several "close-enough". I have been eyeballing this one for awhile based on BoardgameGeek reviews and at 50% off it was too good to pass up.

Thursday, March 4, 2021

Lancer Rifle Gatling

I mentioned previously in comments that the rules used for The Khan's Gambit were a mashup. It occurred to me post-game that there were some bits that might need fixing. Those bits didn't come into play during my game but would have broken things had they, so I set out a little test game on Wednesday night to work through the issues.

The Cossacks have already suffered a loss and retreated.

It turns out, the final result is largely unchanged from what I used for the Khan's Gambit, just some rewording.

To give credit where it is due, these rules are not novel or ground breaking and indeed borrow heavily from the work of others: Kevin White's In Good Company provided much of the framework and the base mechanisms, while Bob Cordery's The Portable Wargame (despite not being a grid-based game), Joseph Morschauser's rules for close combat and eccentric 2/4/6 hits, Buck Surdu's and Chris Palmer's G.A.S.L.I.G.H.T. , and others I have no doubt internalized but forgotten, inspired or directly provided elements of the rules.

This was surprising - and might be one of those flaws in my system, but I'm OK with heroic, if ultimately doomed, last stands by reduced units.
Some might wonder then, why I would  bother cobbling together my own system, especially when I rather enjoy In Good Company and G.A.S.L.I.G.H.T. for this kind of game (10 figure colonial units) just as they are. A fair question. My answer may be less than satisfactory, but it is because I enjoy the process, and frankly, I don't think I can help myself.

These rules have not been robustly play tested and are hardly tournament tight, so you may encounter questions if you choose to use them. If so, always err, as the free FUBAR rules note, in favor of the Rule of Awesome.

For those interested, here is Lancer Rifle Gatling.

If you should find something in the rules that is backwards or is contradictory or terribly unclear, please let me know.


*Final for now. 


Tuesday, March 2, 2021

Simple Equation. Not.

In addition to a figure game, I got in a board game last weekend - Scenario 3 from Advanced Squad Leader Starter Kit #1 (ASLSK). "Simple Equation" is set in October, 1944, with the US assault on Aachen.

Please allow my usual disclaimer that I know most people who read this blog probably aren't a fan of this game system. Certainly as eye candy goes, there's not a figure 54mm or otherwise, in sight. On the other hand, I do like to document the games I've played  as much as possible. I digress.

Because the Germans only have to hold off the Americans, it makes another good solitaire scenario - in my game, the Germans shifted here and there, but by and large, they held their positions. Game play bore out the wisdom of my decisions for the Germans.

Then again, quite possibly, my poor dice rolling for the Americans was in part responsible.


When I decided on the American attack plans, I thought, "I will focus on the right of the German line." I sent my flamethrower that way. I felt smug. I felt clever.

That was hubris.

There is a lot of open ground to cross on the flanks to reach the buildings, as the pictures show (and this analysis of a play through calls that area a "killing zone"). 

The wiser choice would have been to go up the middle, moving building to building as much as possible (especially given that the US can use smoke grenades with near certainty in this scenario - a 5 or less on a d6). Instead, my force (a company + ) tried desperately and in vain, to suppress, pin, break,  or otherwise make it possible to advance, until turn 3 or 4 when I finally got the message and started concentrating in the middle. 

About the dice rolling: German LMGs and HMG were effective at slowing any semblance of advance. Somehow even their LMGs maintained their Rate Of Fire for multiple attacks. Meanwhile, the US MMG was lucky to avoid breaking down.


In the end, I think the biggest flaw in my plan was being too cautious. 

Just as in War of the Rats, I waited too long for the ideal conditions. With 7 turns (for the Americans), I had to move even if it meant leaving some forces behind in a broken state. As you can see below,I sacrificed some units in order to capture buildings, but by then it was far too late.


The Germans won this one, which looked like a "gimme" on paper for the Americans. The US just barely managed to make a dent in the German defenses. 

ASLSK scenarios most definitely reward repeat play and I may put this scenario on the table again this month. Unlike War of the Rats, and Retaking Vierville, this was the first time I had tried this one.

Monday, March 1, 2021

The Khan's Gambit

In the late 19th C. in one of those small states of Central Asia that have been subsumed by border changes in the century plus since, a Khan, having grown tired of watching the intrigues and incursions of both England and Russia in neighboring states, proposed to allow either to claim his kingdom as their protectorate and establish forts and garrisons without interference. His only condition was that  they must win it from the other. His own people were not to be involved in any way and the Khan himself would dictate the strategic objectives to be won.

That Whitehall and Saint Petersburg accepted this proposal might surprise the reader, and indeed it wasn't entirely the case. Commanders on the ground, eager for glory and fearful their opposites would claim victory before word had even reached their governments, acted largely on their own initiative. Even as word of the events moved up through the chains in the respective governments, officials on both sides were willing to wait and see how things played out: if victory, accolades would be awarded, if defeat, local commanders would be called out as renegades, their actions denied as representing their country. 

It should be noted, as was realized far too late by both sides, this is precisely as the Khan had planned.

But that is getting ahead of the story. For now, what matters is that soldiers of the Queen and the Czar met in battle for control of a bridge crossing the river Blast: 


On the matter of the bridge, the English were forced to concede.

*** I apologize for the excessive photos, but I couldn't choose ***