Saturday, January 4, 2020

2020 Vision or Are My Eyes Bigger Than My Stomach?

This year has started off not exactly according to plan. My 19-year old cat (the vet believes she's 20. we can agree to disagree) has had a major health incident and I have gone full-in on making her comfortable and helping her in any way I can - which mostly is just letting her sleep on me, as medically there isn’t much to be done given her advanced age.

So, I read  blogs via my phone or books (currently reading: Infantry Attacks by Rommel), while she snoozes, help her move around when she decides she needs a change, and otherwise put myself in her service. Consequently, I am not able to do much else hobby-wise. If you're a pet person, you probably understand - if you're not, then you probably think I'm crazy. You wouldn't be wrong, but there is better evidence than this!

(She is sleeping now and I am typing this in my phone. My apologies for any strange auto predictions!)

Sitting around with a cat on lap has left me time to think about 2020 and goals/plans/schemes (you were wondering if this would actually include any hobby content!) - inspired by the posts on that topic by so many others.
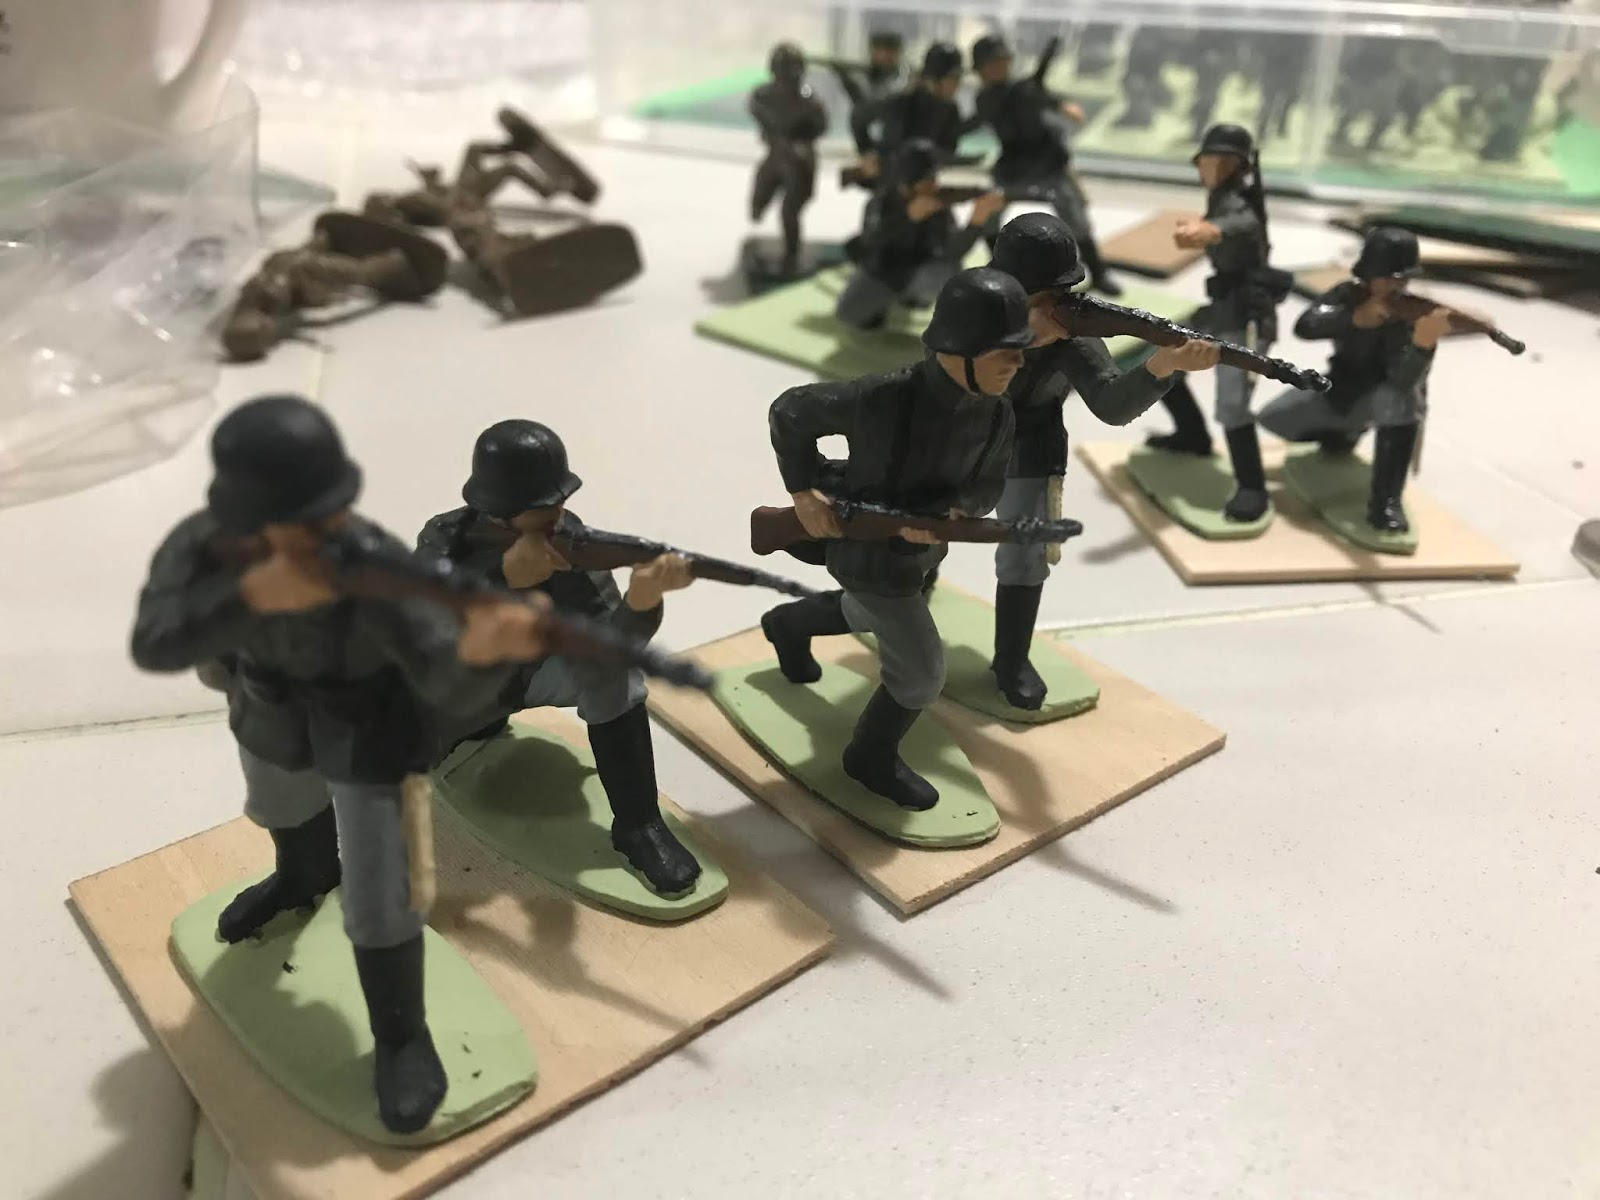
If on seeing this you're first thought is "Oh no! What did he do now?" then you are not alone with that thought. Yes, after some late night deliberations, I opted to change basing, yet again.

The biggest goal is to submit some writing to Lone Warrior, for the website and for the magazine. In the past, I have submitted some lengthy letters, but no proper articles, and as I love to write, it seems like a no-brainer.

My World War I project was well detailed in a previous post - I got some money for Christmas this year, and so will make the purchase of some Italian troops. I do not intend to finish either force this year but I would like to be able to play some OHSW with them by year end - so maybe 8-16 figures each.

I'd like to bring my colonial imagi-nations armies up to 20 infantry each and one general/character figure each. I received The Men Who Would be Kings for Christmas and the skirmish version works with 6-figure infantry and 4-figure cavalry (which is all I have!) and they will be given a run through as soon as I can.

Figures and guns will be added to my 54mm Eastern Front WWII project in accordance with some 1943 TO&Es I found. The idea is to build a battalion force per side where 1 stand is a platoon and then that should give me plenty of variety for games where 1 stand is a squad. Or so goes my rationale.

My 28mm French taunt me (think Monty Python’s Holy Grail) and so I will endeavor to finish at least the one section if not both. Case Red : the Collapse of France is in my shopping cart and should provide some motivation (my intent is to eventually field French vs Italians for the very brief encounter between them and not worry much about the social element).

I received 3 counter-based games from Santa (admittedly, the one may have been from me passing myself off in the guise of Kris Kringle) and they, along with ASLSK will find their way to the table. For all but ASLSK the goal is at least 3 plays each. For ASLSK the goal is to play through all of the scenarios I have between #1 and #2.

Finally, I intend to play at least three campaigns and probably four. The first will be OHSW and the sample map based campaign included in the rules, using unpainted TSSD figures. The others are up in the air but one will likely be the next phase in my medieval campaign.

There is most certainly more I am thinking about but the ideas are less solidified in my head and will likely rise up and completely distract me from my stated goals at any moment and without any warning.

Tuesday, December 31, 2019

2019: Year End Review

It's my favorite time of year when bloggers look back on what they did and think about what they might like to do in the coming year. I'll cover the former in this post and save the latter for another, to spare you from an even longer, more rambling post.


An unused photo from Thanksgiving's Solo Con.

You can read what I was thinking for 2019 in this post but I've quoted the relevant bits here.

So, how did I do compared to what I was interested in doing at the time?

1. Complete a basic force for my Imaginations/VSF British and Russian forces.

The Russians , aka Vodkia, went from zero to a fighting force aided by the acquisition of a well-priced set of Britain's Cossacks, which saved me from having to paint AiP Cosccacks. I finished 10 infantry and the Gatling gun and crew, which included some conversions. Both armies are still without their generals/character figures, although I did get them started, even finishing a camel.

2. Bring my 54mm US and German WW2 armies  up to three 10-figure units (to be based or not as the rules and scale dictate, thanks to magnets and steel), with command and support options for FiveCore Company Command, Morschauser, Bolt Action, Disposable Heroes, etc. 


One surprising change (to me) was dropping the WWII US forces in favor of Soviets.

In the end I brought both sides up to the "3 10 figure units" level, albeit with three 3-figure bases and a single based figure each. In addition, I have quite a few support options for both sides.

3. Related to the above. it's time to touch up the paint, reseal, and rebase my WW2 armies using magnets and steel movement stands to allow me to play with individual figures or with multi-figure bases.

There was virtually no touching up or resealing done, but I did re-base. Multiple times.

The final landing place was 3" square bases (per Morschauser) with 3 infantry figures for the Eastern Front.

British paras, Waffen SS, and my unpainted TSSD Eastern Front Germans and TSSD Soviets were left individually based for very small scale skirmishes (about a squad or less per side). I sort of stopped worrying about the US force after my D-Day commemorative campaign.

I didn't even think about rebasing for my 1/72 PTO figures.

I should note that I'm thinking about re-basing. Again.

4. I am currently researching WWI on the Southern/Italian front, and although the gaming part will be 1/72 and not 54mm, I anticipate posting about it here (because I don't really want to split my postings between this and my dormant blog).

I pretty much covered this one in this post..
5. I want to do some social gaming in 2019 and the best way to do that locally is 28mm Bolt Action. I have acquired the rules already and will do some practice games at home with my 54s to get a feel for them.

Not a single social wargame was played in 2019 (just like nearly all years prior).

To be fair, my  interest in painting my 28mm French waned as I began to see the completion of my Eastern Front 54mm collection as a real possibility.

And now it looks like Chain of Command is by and large the game of choice at said game shop.


****
So, given what I thought I might do, I think I did pretty well.

But there was a lot that I didn't have any particular ideas for that I did this year.

I played quite a few games,  many of which are documented here and made way more time for my hobby this year, than I have had in recent years - in part that was about having a plan, no matter how non-committal, so as not to waste time deciding what to do when time opened up. But I think it was also just a general commitment on my part to making time for hobby stuff over mindless activities like just turning on the TV and veg-ing.

One Hour Skirmish Wargames in action. More OHSW action will kick off 2020.
Consequently, because I use this blog like I used to use a spiral bound notebook of my wargaming activity, I hit publish on way too many blog posts. Like this one! Including this post I am at 134 posts for the year. This is a level comparable to the heydays of my defunct Tabletop Diversions blog.

Other high points:
  • I enjoyed many exchanges in the comments here and on others' blogs. Although comments aren't the best for extended discussions, I find those exchanges fire me up with a greater appreciation for the hobby community.
  • I spent a lot of time reading other wargamers' blogs - sometimes going back years of posts. That's right. I'm peeping your old posts. At one point, a few years ago, I stepped away because I thought I spent  too much time reading blogs. I threw that out the window this year and embraced my addiction with both arms.
  • I dove into counter-based games beyond Worthington's 1776 - including Advanced Squad Leader Starter Kit - something that I discovered I really enjoy. With three more games acquired at Christmas, I suspect there will be more of this in 2020.
  • I played two campaigns:
    • a three game campaign in recognition of the 75th anniversary of D-Day 
    • a five game imagi-nations medieval campaign using One Hour Wargames rules.
  • Not sure how many figures I finished painting as I didn't keep track, but I know it was more than in 2018. Or 2017 for that matter.
  • Wrote two sets of grid-based WWII company per side rules, still being played and altered but the bones are there.
  • Finally got a new ground cloth that is exactly what I wanted
  • I don't know how many WWI / WWII movies and TVseries I watched this year - I didn't document them all here. Some were repeat viewings of loved favorites others were first and last time views of terrible cinema, most fell in between. A few standouts of those new to me: 
    • April 9th
    • Is Paris Burning?
    • The Fortress
    • Battalion
    • Night Swallows (TV series)
    • The Dawns Here are Quiet (TV series)
    • Gallipoli (TV series)
    • The Crimson Field (TV Series)
Next up: the 2020 "plans"

Happy New Year to All!

One Hour Wargames Medieval: Botched Relief (Scenario 28, Tempus Campaign Game 5)


The Duke of Lux had ordered Lever du Soleil to be held by a small force under the command of Lord Alba. Learning of the approach of Nox forces, under command of Lord Buio (in service of the Duke of Tenebris), Alba sent for a relief force. 

To his dismay, the indecisive Baron Nuvoloso had been sent. Ever non-committal the Baron arrayed his force on a hill overlooking the approach to Lever du Soleil but took a wait and see attitude towards the proceedings, even as Buio's small force advanced on the village.


Meanwhile, in the village, Lord Alba organized his men-at-arms and signaled his knights located just North of the town to protect the north side of the village.


Buio's knights raced towards the village intent on driving the Dies force out.


Buio could not help but notice the Dies banners flying and the mass of men and horses on the hill, and so deployed one unit of knights to guard against a flank attack.

As Alba's knights moved to protect the North end of the village, Nuvoloso begrudgingly committed a unit of knights to the defense. They made their way towards the village, taking up the position originally held by Alba's knights.


The battle lines crashed at the village. Buio's levies moved up to bring additional pressure to Alba's force in the village.


Unfortunately, the knights to their flanks were destroyed or driven off the field, leaving the levies engaged to their front with the men-at-arms - who valiantly defended the village under Alba's direct leadership - and exposed to a charge from Nuvoloso's knights.


The result was predictable. 


Judging the combined losses from all of the previous battles be too costly to continue the campaign, and with the heart of winter approaching, Tenebris ordered a general retreat to the Nox side of the Nox-Aurora border - and in doing so, conceded victory to his opposite, the Duke of Lux.

Tenebris then ordered a horse readied and, with a handful of knights and men-at-arms, rode West ahead of his retreating army to personally report his failing to Luna, Empress of Nox.
 
For his part, Lux did not order any pursuit of the Nox army -  the Dies army had suffered their own significant losses and Lux too noted the coming winter weather. Of course, some commanders led raids against the retreating Nox forces, but nothing more than minor skirmished resulted.

Nuvoloso, meanwhile, claimed an outsized role in the victory to any and all who would listen, though he himself had committed just one of his four units to the battle. Alba was not amused but, outranked by the Duke, he kept his growing disdain for the latter to himself, and when asked, would only reply that he was "grateful for the assistance".

******
The scenario was 28, Botched Relief.

Red (Dies) had 4 knights, 1 levy, and 1 men-at-arms. Because they lost the last battle, they had one unit with 1d3 fewer hit points.
Blue (Nox) had 3 knights, 1 levy. Because they won the last battle, they had one unit with 1d3 extra hit points.

I created plans for both sides, diced to see which I'd follow for each and used a similar random event method I had been using to provide positive and negative effects, but rolled for each side. That is, I was playing to find out who would win, not to play one or the other side as "mine"

Nox rolled no such events, but Dies did, multiple times, and then rolled favorable events at that. That said, the game only lasted 6 turns. I credit this to a poor plan for the Nox rather than benefits from random events..

I played a second game with a different plan that involved trying to ride around the Red force, to strike at the village from behind, but the end result was the same. That game lasted ten turns, and both sides rolled several random events. As plans go, I think this one was better but as has been observed before, men-at-arms in cover are extremely difficult to dislodge.

And, since a unit once engaged in melee stays that way, they essentially expose themselves to flank and rear attacks at that point - meaning the Nox knights were easily rolled up after trying to engage the men-at-arms in the village.

Also, I decided that contact with any part of the village constituted contact with the men-at-arms within. Looking at the map, the village is a rectangle and it's definitely wider than 6 inches- I eyeballed it as 9 inches wide and 6 inches deep. Maybe when I get a print copy of OHW, I'll take a ruler to it and figure it out correctly.

I'm sure I'll think a bit more about the campaign, and thus have more to say about it, but for now, I'll just note that it was an enjoyable experience being able to write a narrative that continued from one session to the next. I have played precious few wargame campaigns, but I can say that I prefer them infinitely more than one-off games.


Tuesday, December 24, 2019

Here We Come a Camel-ing Among the Leaves so Green

I happen to have it on authority that Santa is en route, so I'll keep this short.

Whether or not you celebrate anything at all during this Winter holiday season, I hope you're able to spend time with family, friends, animal companions, and toy soldiers. Of course, I hope that for all of us always, but it seemed like a good time to mention it.

This will be the last figure I finish in 2019. Armies in Plastic camel. The color scheme was inspired by Britains and others on eBay. The rider is in progress. I wasn't going to paint up all of the camel cavalry but I really like the way this one looks, so I may add them to the 2020 pile.

Merry Christmas and Happy Holidays!

One Hour Wargames Medieval: Bottleneck Situation (Scenario 24, Tempus Campaign Game 4)

Seizing the momentum with his victory at the Battle of Aube, Tenebris sent Lord Buio with a fresh force to probe for an opening by which to attack the Dies army. As this force moved Eastward in two columns, it ran into a blocking force under the command of Lord Luminoso, in service of the Duke of Lux, near Lake Dageraad.


Buio sent his knights around the lake to strike the Nox force from the rear.


The Nox men-at-arms advanced down the road where they came under fire from peasant archers shooting from the thick woods North of the road.

Unable to effectively engage the archers, Buio ordered the men-at-arms forward in close order - willingly exposing one unit to an onslaught of arrows,so the lead unit could engage the Dies men-at-arms holding the road.


As  his knights made their way around the lake, they discovered that their opposite number were maneuvering to counter their efforts.


Men and horses massed in preparation for what was to come.


Luminoso's men-at-arms advanced towards the Nox column on the road, in order to contain them between the lake on one side and the archers in the woods on the other.


Both on the road and to the East of the lake, the forces clashed..


Seizing opportunity, a unit of Nox knights raced past the melee in an effort to outflank the Dies men-at-arms blocking the road.


Buio hadd mistakenly held his levies in reserve too long and they were too far back to cover the exposed rear of his last unit of men-at-arms. Arrows rained on them from the forest.

Fortunately for Buio, his enterprising knights were positioned to strike.


As the Nox men-at-arms crashed into Luminoso's men-at-arms, Nox knights crashed into them from the rear. The Dies men-at-arms were utterly destroyed. Meanwhile Luminoso's knights, though badly battered, prepared to face the other unit of Buio's knights.


Pinned by the lake to their rear, facing an enemy to their front, and the possibility of a flank attack as well, the Dies knights fought bravely, until all fell, fled, or surrendered.


The peasant archers remained but they  were of little concern to Buio with the road before them open. Indeed without additional troops to deal with the enemy definitively, at best, the archers could hope to harass the Nox force from a distance.


When the messenger reached the Duke of Tenebris with news of the victory, the Duke set into motion a plan for forcing the total capitulation of the Dies army.

*****
The scenario was number 24, Bottleneck Situation. It lasted 8 turns.

Edit: I forgot to include the Orders of Battle! And some other things too - in my defense, I wrote up the rest of this post at 1 AM.

Red (Dies) - 2 knights, 1 men-at-arms, 1 peasant archer (functionas levies with bows, only unit that can enter woods)
Blue (Nox) - 3 knights, 2 men-at-arms, 1 levy

Nox was "my" army, Dies had a few setup options I came up with and diced between (again I put some effort into this, a few days in advance, and it was a lot of fun - adding what amounts to an entirely different kind of game. They were also the beneficiary of the simple solo system I use and indeed, it helped keep one of their knights on the table when they would have otherwise been eliminated.

Also, it wasn't clear to me exactly how the woods were to function. Neil Thomas isn't terribly specific - how close to the edge must a unit be to shoot out? If a unit in the woods is touching the edge of the woods and an enemy unit contacts them, can they engage in melee even though no other unit type can enter the woods properly? 

I decided that the peasant archers had to be within 1" of the edge of the woods to shoot out and that  Blue units, save for any archers, could not attack the Red unit in the woods - since units aren't exactly where the bases are, an attacking unit, being in base to base contact with a unit in the woods is essentially the same as trying to enter the woods and that's not allowed.

This is quite an advantage for Red, but as they have only 4 units total, it's not unfair. In the event, Blue had no archers. However, by using one unit of men-at-arms to absorb hits from the peasant archers, they could prolong the survival of the lead attacking unit of men-at-arms and more or less render the unit in the woods ineffective.

With this victory, Nox evens the score, 2-2, and so it looks like game 5 will decide the campaign!

Game 5 will probably be my last game in 2020 and is tentatively scheduled form Monday 2019-12-30.

Friday, December 20, 2019

WW I Southern Front : A Look Ahead to 2020

It's that time of years where bloggers start to reflect on what has been and what is to come - I happen to love this kind of thing as I find it inspiring. Hopefully, you do too. If not, feel free to jump ahead to the tl;dr section.

One of my goals for 2019 was to get started on a Southern Front / Italian Front WWI wargaming collection. I had purchased several boxes of 1/72 figures a few years ago, with just vague plans, based on a reading of The White War: Life and Death on the Italian Front 1915 - 1919. However, nothing had come of it in the intervening years.


TL;DR Summary:

2019 turned out to be one about background information - much more has been read. Nothing was painted but figures have been acquired and rule choices have been narrowed. This will be an ongoing project that will kick-off in 2020, not least because the initial figure batch will be under the tree as a gift to myself for Christmas.

PSA: there's a link now at the top of my blog to a list of all of the available figure ranges and scales for this front that I am aware of.

How I Got Here:

This year, I returned to my reading which, I'd like to believe, gave me a better understanding of the war on this front, as well as solidified my ideas about what kind of gaming I'd like to do, at least in the immediate future (that being 2020). So, while nothing was painted, decisions were made.

First, for context, here is what I read this year:

A Soldier on the Southern Front: The Classic Italian Memoir of World War 1
The War in the Mountains
The Italian Army and the First World War
Caporetto and the Isonzo Campaign: The Italian Front 1915-1918
Hell in the Trenches: Austro-Hungarian Stormtroopers and Italian Arditi in the Great War

I had previously read:
The Italian Army of World War I
The White War: Life and Death on the Italian Front 1915 - 1919

And for completeness' sake, at this moment in the queue I have Rommel's  Infantry Attacks and the two Osprey Austro-Hungarian Forces in WW I books by Peter Jung. I anticipate at least one, if not two, additional books on the topic for Christmas (and if not, Christmas money will be spent acquiring them and a few others specifically about the British involvement in the front)

In addition to the reading, I played Burning Mountains (only once completely, as it's a relatively long game - BGG shows 7 hours and that's about right) - a game focused on the 1916 Austrian Spring offensive.

All of this has me convinced, that I have no desire to reproduce battles with divisions or more with miniatures at this time (maybe some day, with 6mm, so I can fit it on my kitchen table). M:y interests are late war (because assault troops) from man-to-man fights in the trenches up to maybe regiment per side. Conveniently, these levels of engagement are described in just about every book I've read - sometimes in great detail - most especially in Hell in the Trenches.


Figures:

Two boxes of Armies in Plastic WWI Germans in Stahlhelm.

As the picture above shows, I will be doing this in 54mm rather than 1/72 as originally planned (nor in 28mm with the lovely figures from Scarab because beautiful as they are, I really love 54s. (As if I needed to say that.).

The boxes of Armies in Plastic Germans in Stahlhelms pictured will serve as the Austro-Hungarian sturmtruppen and late war regular infantry - and I can always paint up some as Germans too for Caporetto. The uniforms aren't exact matches for Austro-Hungarian forces, but will have to do. The only purpose-made alternative is expensive and limited poses from ICM and Italeri in 1/35. I might mix in some converted figures in peaked caps, just for fun, either from Airfix Afrika Korps or Marx Japanese (per Tim Gow's idea).

For Italians, the bulk are going to be bersaglieri from Waterloo 1815 (who for some confusing reason use the same image as the 1/72 regular infantry box. They don't picture bersaglieri). Dulcop alpini would be nice but I'm not holding my breath they will turn up at reasonable prices. AiP French without the great coats or blanket/coat rolls can provide some figures here and there.There are no arditi figures - but, while their uniforms are described as being special, the photographs often show them wearing basically the same thing as standard infantry - maybe different cut jacket, but nothing I'd fret over.

I may end up supplementing both sides with the occasional metal figure from Irregular (they have Austrians in caps, and alsotheir multi-part figure range).

Artillery will be off table for the most part.  Any on-table field guns will have to be scratch built or built from 1/35 kits.Irregular makes a gun that could work for either side if you squint, but it's pricey for my tastes. Flamethrowers will have to be scratch built. MGs and teams will be in 1/35 from ICM and Italeri.

All figures except weapons with crew will be individually based.

Rules:
 

For rules, I am leaning towards
  • HMG by Agema -  I've never seen a review of this game but I took a chance and picked them up from Wargame Vault and they have my interest.. They use 9-figure Austrian companies and 15-figure Italian regular infantry companies or 8 figure bersaglieri. That means probably a battalion-ish per side - an attacking Austrian infantry battalion led by a company of stormtroopers would be a not unreasonable 45 figures and a battalion of bersaglieri is only 24-32 figures
    Messing around with nine-figure Austro-Hungarian cmpanies for Agema's HMG. Organized into two sturmkompanies and two of regular infantry.   Lot's of bent barrels here - nothing hot water can't fix. Those four figures in the back right are kind of awkward.
  • One Hour Wargames, Machine Age rules -  these would require modification, but it's easy to build up a force. Like the WWII rules, there are no close assault rules. It is even odder here because unlike in the WWII rules, the WWI units have facing and therefore can be flanked. I'd ignore cavalry and replace them with assault troops who would have a +2 bonus when attacking..
  • The Portable Wargame - 4 -6 figure companies in 3" or 4" squares,  for say up to a regiment on each side. 
    6-figure companies. A sturmkompanie leads the way for an infantry battalion. A typical use of Austro-Hungarian stormtroops.
  • A home variation on Featherstone's simple modern rules
  • Some home brew rules with or without a grid - I have started developing a game for the former, albeit with homemade counters, where 1 "base" is nominally a platoon.  
For smaller actions, I have:
  • One Hour Skirmish Wargames  - 1:1, maybe 9 or 10 figures per side
  • Trench Hammer (Nordic Weasel) - 1 squad per base
  • Trench Storm (Nordic Weasel)- 1 squad per base
  • Through the Mud and Blood (Two Fat Lardies)  - 1:1, field 30-100ish figures
  • Price of Glory (Iron Ivan / Brigade Games) - 1:1, field 30-50 figures
I have probably another dozen sets of rules for much larger battles - divisions and such. But odds are those won't see any use for these figures. Maybe later.


If you made it this far, cheers to you and thanks for sticking with this lengthy post!

Tuesday, December 17, 2019

One Hour Wargames Medieval: Static Defenese (Scenario 14, Tempus Campaign Game 3)

The Duke of Tenebris continued to fall back after the loss at the crossroads. Reinforcements from Nox arrived from the West, but morale was shaken among the veterans of the last two clashes. Determined to stem the advancing Dies tide, Tenebris ordered Lord Buio to occupy the village of Aube and to hold the hill South West of the woods near there in order to prevent the Duke of Lux from advancing down the main road to the border and force his army to an overland route which would take considerably longer.

If not, Lux would be in Nox territory in a few days time.

For his part, the Duke of Lux sent the wing of his army under the command of Lord Leggero,  with orders to take either the hill or to occupy Aube for the opposite reasons. Either would give Dies the means to control the road and allow the army to advance to the border

(The action is described in the captions below the picture)

Leggero split his force - sending the bulk to take the village, despite the narrow frontage available for the attack. His knights on the left were to be held in reserve until they could be brought around the woods for a finishing blow.
Tenebris had made a wise choice in Buio, who ordered his knights protecting the flanks of the village to ride out and meet the enemy, as the defenders in the village put up a spirited defense.
Aware of the losses his forces in the village had sustained, Buio ordered the knights from the hill to take to the village to aid in its defense.
The first unit of Dies knights fell or fled but the men-at-arms, brimming with enthusiasm of fresh reinforcements prepared to storm the village and finish the job.

As the knights from the hill arrived, they were pursued by Lord Leggero's reserve of knights. Buio's archers prepared to meet them.

And meet them they did. When the Dies nights passed the hill they came under fire from archers there and then from the archers West of the village.  Although the archers near the village were ridden down, the knights were struck down by arrows from their front and back.
Dies men-at-arms seized the village, finally defeating the knights there.
It wasn't enough however - despite defeating the Nox knights, the village, and the men-at-arms within it, were subject to a bombardment of arrows from the remaining Nox archers.Eventually the men-at-arms were forced to abandon the field.
A Nox victory and the Duke of Tenebris keeps his head a little longer.

*****
Scenario 14, Static Defense
Red force - Nox - 3 knights, 2 archers, 1 men-at-arms
Blue force - Dies - 4 knights, 1 men-at-arms, 1 levy

Dies had 1 unit get a bonus of 1d3 hit points. Nox had 1 unit with a 1d3 bonus, and one with a 1d3 penalty.

Red must keep 2 units within 12" of the hill and 2 units within 12" of the village.

Blue has 15 turns to capture either the hill or the village.

Dies was "my" army since they had more to do, Nox was the NPC side, to their benefit. This makes three losses for the side I commanded, in case you were counting.

Inspired by Dale's postings about Mr. Babbage, I spent a lot of time thinking about how I would approach this from the Nox side, and came up with several plans which were diced between. This isn't normally something I do - I usually make a plan just before the game starts and hope for the best. This was a fun exercise to really think about the battle field and the capabilities of the forces involved and where the best deployments could be.


Yes, that's me taking credit for the Nox win even as I am responsible for the Dies loss!

The last few turns of the game saw no movement but were still fun to play out, rather than concede. The men-at-arms had no real options once they had no one left to melee nearby - turn 10. It would have taken two turns to reach the archers, and two turns to get back to the village- the archers had a 1 point bonus to their hit points due to a random event earlier, so they were not going to go down easily. Not a one hit knock-out that's for sure. The only question was whether or not the archers could do enough damage before the game clock ran out.

It didn't look like it on their first attack (men at arms take 1/4 damage in a village). But then the archers rolled 5s and 6s for their attacks and the men-at-arms, already reduced by their fighting with the knights previously, could not hold on.

 The game ended on turn 14.

The next campaign game is the bottleneck. Nox will be attacking as they push back Eastward into Aurora.

Speaking of, here's a very very very rough attempt at a map (a better, larger (this one is 3x5), one will be made eventually, based on this.) so I can keep my directions and country names straight:


Dies is still ahead 2 - 1. Will there be a game 5?