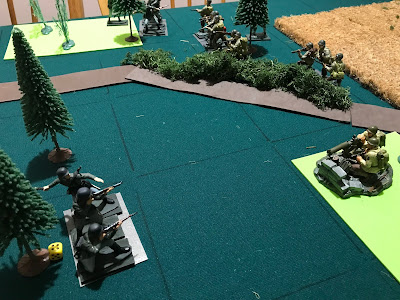
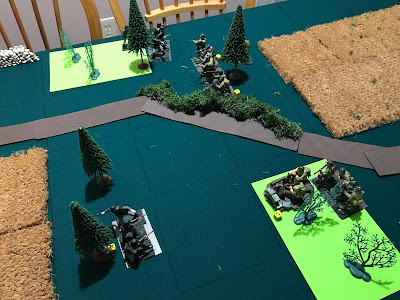
I changed the sides involved - set it in France somewhere, with the Germans holding the farm while the US advances. Both sides are pretty skimpy.
Here is the map converted to a grid layout:
For this scenario, I ruled that fields blocked line of sight, except that units in Farmhouse 2 (assuming they were on the 2nd floor) could see all the way to Woods 5, over Field 3.
As the attacker, the US set up on the South side of the board - and I chose to put the whole force in Field 1. Although I split them up into two grid spaces.
I placed the German MG in Farmhouse 2, but used blinds for the others, since I am playing solo.
 |
| The blinds are the small green rectangles. |
I apologize in advance for the length of what follows, but I've included some detail about how my grid-based WWII rules work. These explanations are enclosed in square brackets.
[I use a deck of cards for initiative, but the attacker gets a free "move" to start the game, rather than drawing a card. ]
The US rifle squads and platoon leader advance up to the edge of the fields, but the MG team lagged behind.
[Because they are out of LOS of the enemy, and will spend the entire move out of LOS of the enemy blinds thanks to the hedge in the road space North of Field 1, and Woods 1, the rifle squads can move two spaces instead of its normal one space. The MG team can only move one space regardless. The platoon leader, the single mounted figure, can always move two spaces]
The first card is 3 of Spades. The US loses the initiative to the Germans.
[An odd numbered cards means units can move, or they may fire at a disadvantage. None of the blinds, nor the MG in the farmhouse have LOS to the US units, so there's no need to fire.]
I decide that, since the US is more towards the eastern edge of the map the blind in Woods 5 will move up into Fields 3. [It moves two spaces because no US unit has LOS.] The rest stay in place.
I decide that, since the US is more towards the eastern edge of the map the blind in Woods 5 will move up into Fields 3. [It moves two spaces because no US unit has LOS.] The rest stay in place.
The next card is the Jack of Diamonds. The Germans lose initiative and the face card means US units can move, shoot or both.
[I do have an "order of operations" within the phase, so if they were adjacent to the enemy and wanted to launch a close assault, or if they were going to group fire, they would have to do those first, before any individual moving or shooting.]
The MG team moved North one space, while the squad that started in that space, moved North to the road, using the hedge for cover where they came into LOS of two enemy blinds in Woods 4. One of the blinds took advantage of opportunity fire, but fortunately they had no effect on the US squad.
[Only one unit, whether a blind or not, can take opportunity fire as the result of a unit's movement.
Since I wasn't using any special AI rules, I just made them up on the spot and ruled that one of the blinds would fire, but since I didn't know which if either was real, I would only roll 1d6 instead of the usual for a rifle squad (more on that later) and in any case, I still wouldn't reveal the unit even if it hit. 5s or 6s hit and I rolled a 2.]
Not knowing where the shots came from, the rifle squad targeted the top most square in Woods 4 and opened fire.
[Since there isn't necessarily an enemy there, it's a blind, this is something akin to reconnaissance by fire in Crossfire (my rules for this are kind of fluid at this point). Rifle squads roll 3d6 to hit a unit in an open grid space and subtract one die if the target space provides cover. So, the squad rolls 2d6.
Fives and sixes hit, and I rolled a 5 and a 6. The two hits are ordinarily a suppression result., but when I flipped the blind over, it was a decoy. ]
The area of the woods they targeted was empty.
Meanwhile, the other two squads with the platoon leader advanced into Woods 1 and immediately came under fire from the blind in Woods 2.
[Each rifle squad in the target space is attacked separately by the single unit - the dangers of bunching up]
It was to no effect and the US squads returned fire
[Since they moved they can't combine for a group fire and have to fire individually. Each squad scores a single hit - a pin result - but pin results don't stack, and so the second one is ignored. Had they been able to combine fire, the two hits would have yielded a suppression instead.]
The blind turned out to be a German rifle squad with the platoon leader and they were pinned.
The Germans got the next card, a six of clubs.
[On even numbered cards, units may fire, or move if they pass a morale/motivation check]
The squad in Woods 2 rallied and then opened fire on the US squads in Woods 1.
[They could have skipped the rally attempt - pinned units can still shoot. If it had failed, they wouldn't have been able to shoot. It was a gamble I took by mistake. Fortunately for them, they passed.]
They suppressed one squad [they scored two hits] and pinned the other [1 hit].
Since it's a fire card, I decided to flip the remaining blind in Woods 4 to give them their full fire dice if they were a real unit , rather than the reduced dice for the blind. It was the other rifle unit [that meant remaining blinds were decoys and were removed]. They opened fire on the US squad in the road/hedge unit to no effect.
The US squads in Woods 1 struggled to rally the suppressed unit, but the squad in the road/hedge space pinned the Germans in Woods 4.
[They did so on a move card - on a move card, a unit can still fire, but they reduce their dice by one die. Accounting for cover, the squad rolled 1d6 and hit]
This allowed the MG team a chance to move into the orchard and setup opposite the Germans.
The Germans in Woods 2 continued firing on the US squads in Woods 1, making it difficult for them to accomplish much of anything.
[Suppressed units can't do anything anyway, and I couldn't successfully rally them to save my life, let alone theirs.]
The squad in the road/hedge space moved into the orchard to join the MG, since the German unit opposite was still pinned.
Speaking of, the Germans managed to pin down the US MG on their own initiative. It would stay pinned for what seemed like forever.
The Germans on the eastern edge fell back into Orchard 1, figuring they'd draw the US squads into LOS of the MG in the farm house, which had been quiet thus far.
Since that farm house is the objective, the plan was destined to work - the US squads tried to move up but were hit by opportunity fire from the German MG.
[Only 1 unit can opportunity fire as a result of a single enemy action, and the MG makes more sense than the rifle squad. They rolled for each unit in the target space and pinned one and suppressed the other. Units that are suppressed as a result of opportunity are forced back one space.]
The US eliminated the German squad in Woods 4, but while the rifle squad moved up, the MG was stuck due to that earlier pin result [pinned units cannot move]. It would be several more card draws to finally rally successfully.
Meanwhile, the Germans in the farm house combined fire and eliminated the US squad and platoon leader in Orchard 1
[For combined fire, each firing unit calculates their dice and then the dice are pooled and rolled together. So, in this case, the MG had 4 dice, minus 1 for the US unit being in cover. The rifle squad had 3 dice, minus one for the US unit being in cover. So, they rolled 5d6 to hit. They scored three hits and that eliminated the US squad. The platoon leader is automatically eliminated when all other units in the space are destroyed.]
The US MG and rifle squad in Woods 4 move to the eastern square of the woods, to get into LOS of the farm house, but took op fire as a result. And just like that, the US weapons team was suppressed. Just great.
My disappointment with them was short lived as they were eliminated shortly after by combined fire from the farm house, and that left two rifle squads to try and coordinate some kind of assault.
But it never materialized. In short order, the combined fire from the Germans [On two separate card draws] eliminated both rifle squads before they could even decide to fall back.
A decisive German victory.


Like the use of activation/initiative cards here - and what seems a simple set of rules seems to have a lot of tactical nuances.
ReplyDeleteThese reminded me a lot of a squad leader scenario, but eminently more playable, and with classic German Airfix - what's not to love. :)
Thanks Duc de Gobin! I can't take all of the credit for the initiative system. It's based on an amalgamation of Paper Tigers and Five Core Company Command.
DeleteSeems to work well.
ReplyDeleteI found a few things to tweak during this play through (which I suspect will always happen) and I am ruminating on how best to handle bocage for my planned D-Day scenario, but they are certainly playable at this point with infantry only.
Delete